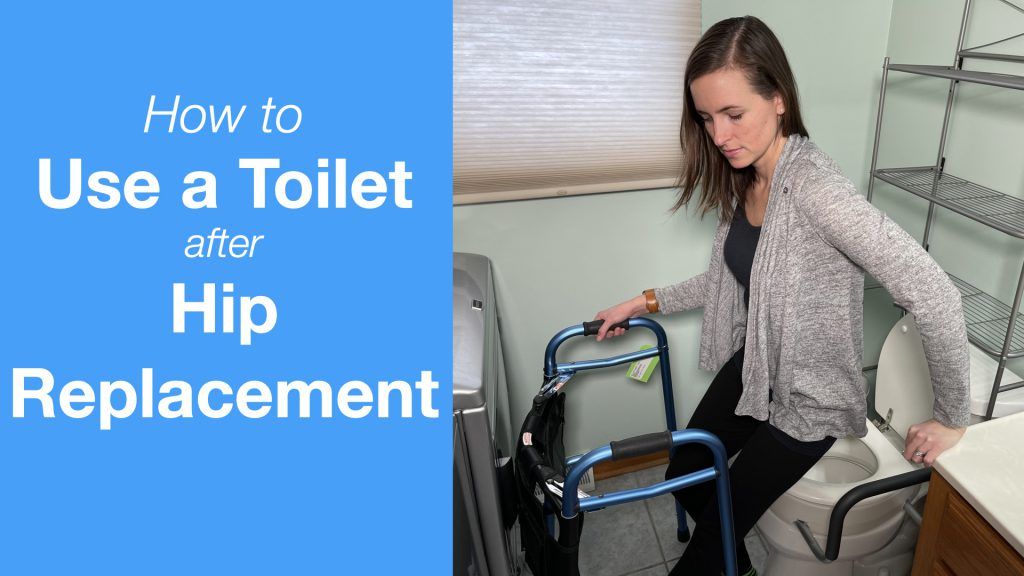
Are you or a loved one faced with a hip replacement? Wondering how to use a toilet after hip replacement surgery?
This post will detail how to use a toilet after a hip replacement surgery. Specifically, we will cover the equipment needed, transfer technique, and hygiene considerations.
A toilet “transfer”, as it is commonly known in the medical field, is simply the process of getting on and off a toilet and the process can be intimidating if you have never had the guidance of a medical professional.
But have no fear! I’ll show you how.
If you prefer a video how-to, please check out my video on my YouTube Channel.
Let’s get started!
Overview
Estimated Time: 15 minutes (for equipment installation and setup)
Estimated Cost: $77* USD
Please note: Before we begin, you need to make sure you follow all the instructions and warnings provided by the manufacturer. The steps below are only to provide guidance with installing or assembling equipment, but you should always follow the warnings and instructions provided by the manufacturer and always speak with your medical team before adding new equipment to your routine.
Disclaimer: Always talk to your medical professional before deciding or changing the medical equipment that you utilize and how you should use it.
Supplies Needed
Steps
- Prepare Equipment
- Stand in-front of toilet
- Extend Surgically Repaired Leg
- Slowly Lower Yourself onto Toilet
- Transfer off of Toilet
Step 1: Prepare Equipment
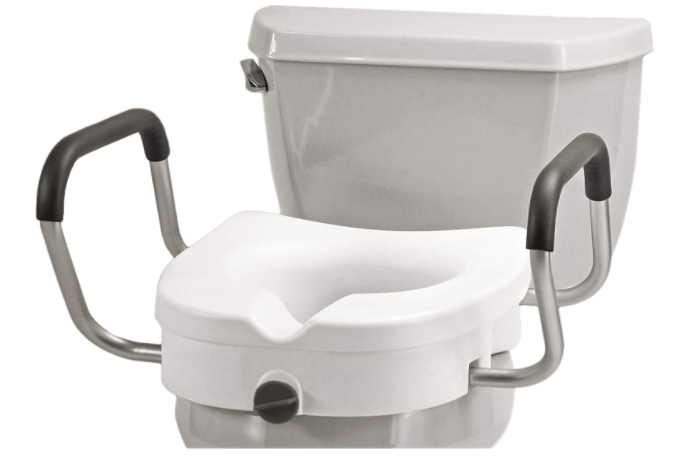
For any hip replacement recovery scenario, I recommend the purchase of a toilet seat riser. If you already own a “comfort height” toilet (17 in/43 cm to 18 in/46 cm) and your height is 5 feet 2 inches/63 centimeters or shorter, you may not need a toilet seat riser.
Consider your situation and ensure that you will keep a 90 degree hip precaution when you sit on the toilet.
Even if you have access to a comfort height toilet, you may still want to utilize toilet safety rails. Below is an example of a common toilet safety rail. If you are interested in more information, we have a post all about toilet safety rail installation.
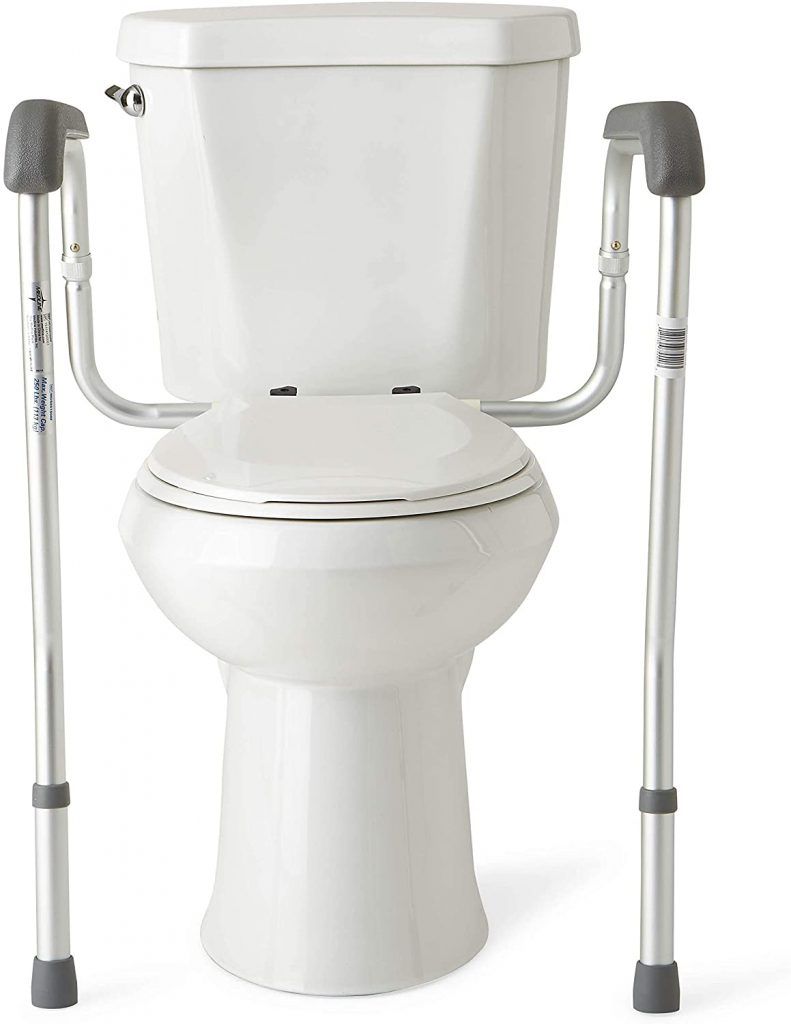
The vast majority of people will require a toilet seat riser. For the toilet that I will be demonstrating on, I will be installing the Nova Toilet Seat Riser with Arms. This particular toilet seat riser will give us about 4.5 inches (11.5 cm) of added height.
Remember, in order to ensure that you do not break your 90 degree hip precaution, you will need to find a riser that raises the height of your toilet seat to 17-18 inches (43-46 centimeters).
You will need to install the toilet riser before you attempt to transfer onto the toilet. Consider buying a toilet seat riser ahead of time and attempting to install it, or have a caregiver install it, before your hip replacement. This planning will make the process easier when you are home and do not need to wait for someone to install your toilet riser in order to use the toilet. We do have an existing post on how to install a clamp-on toilet seat riser.
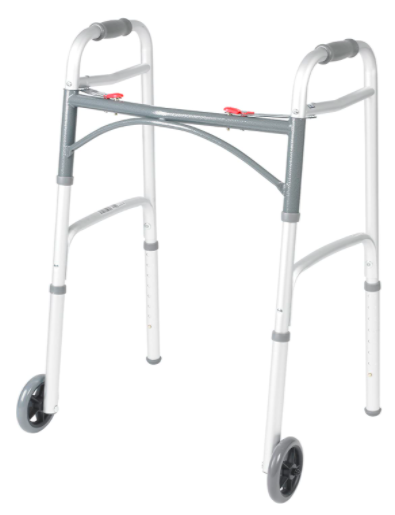
The other piece of equipment I recommend for hip replacement recovery is a walker. If you are recovering from any kind of surgery, they are going to recommend you keep the walker with you to prevent you from slipping or making any dangerous, unsupported movements in the bathroom. In this case, we will be demonstrating with a simple, inexpensive 2-wheeled walker.
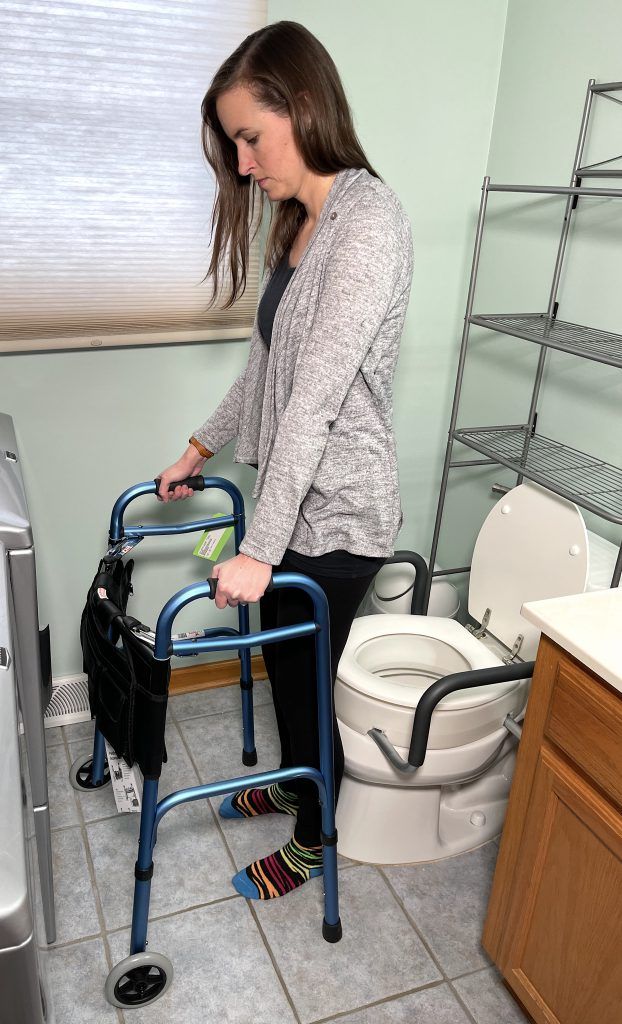
Step 2: Stand in front of toilet with walker
To start to transfer onto the toilet, you need to position yourself and the walker in front of the toilet facing away from the toilet.
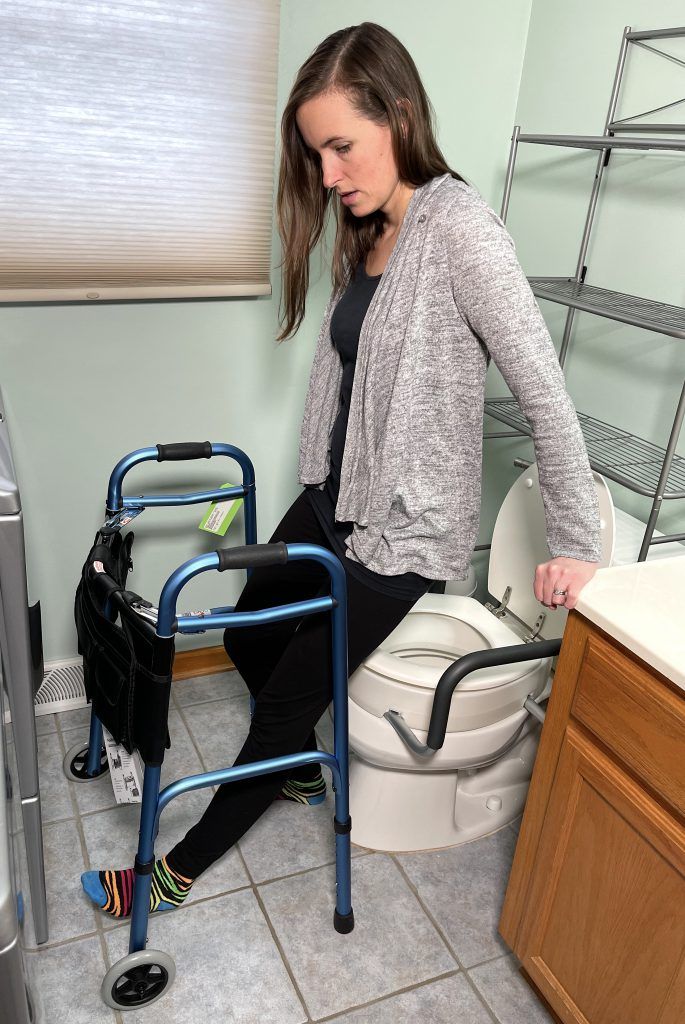
Step 3: Extend surgically repaired leg
Next, and this is very important, extend your surgically repaired leg out front.
Reach back and find a solid surface which could be a countertop next to the toilet or the handles on the toilet seat and place one hand one of those surfaces. Your other hand can remain on the walker or on another solid surface like the handles of the toilet seat.
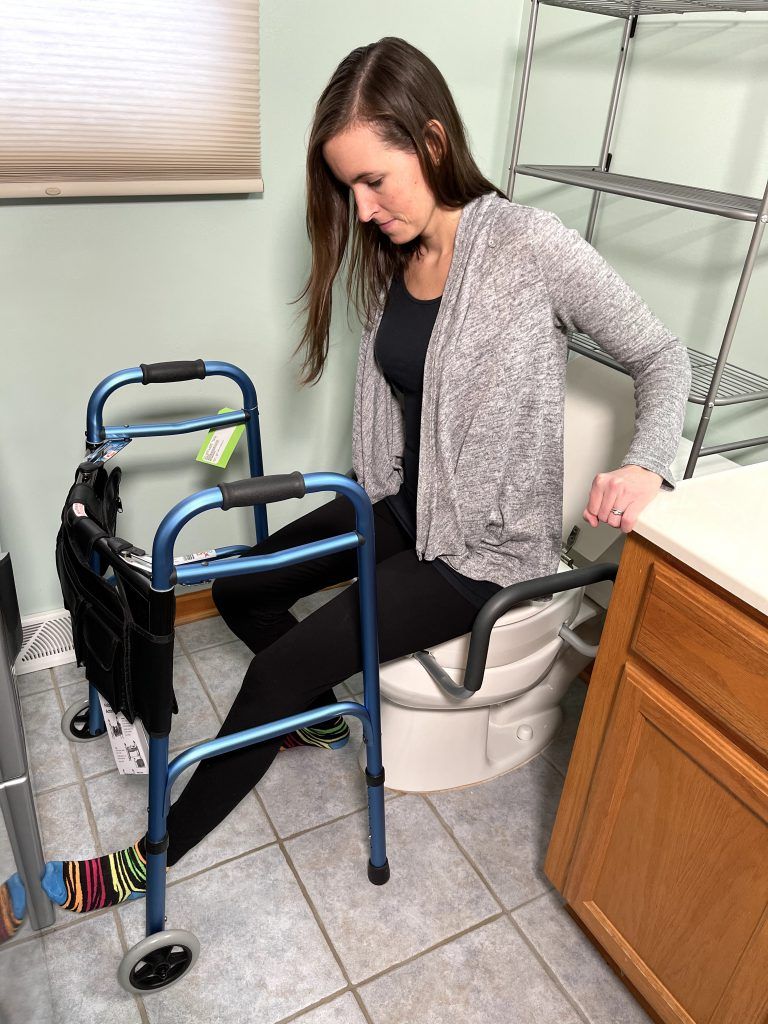
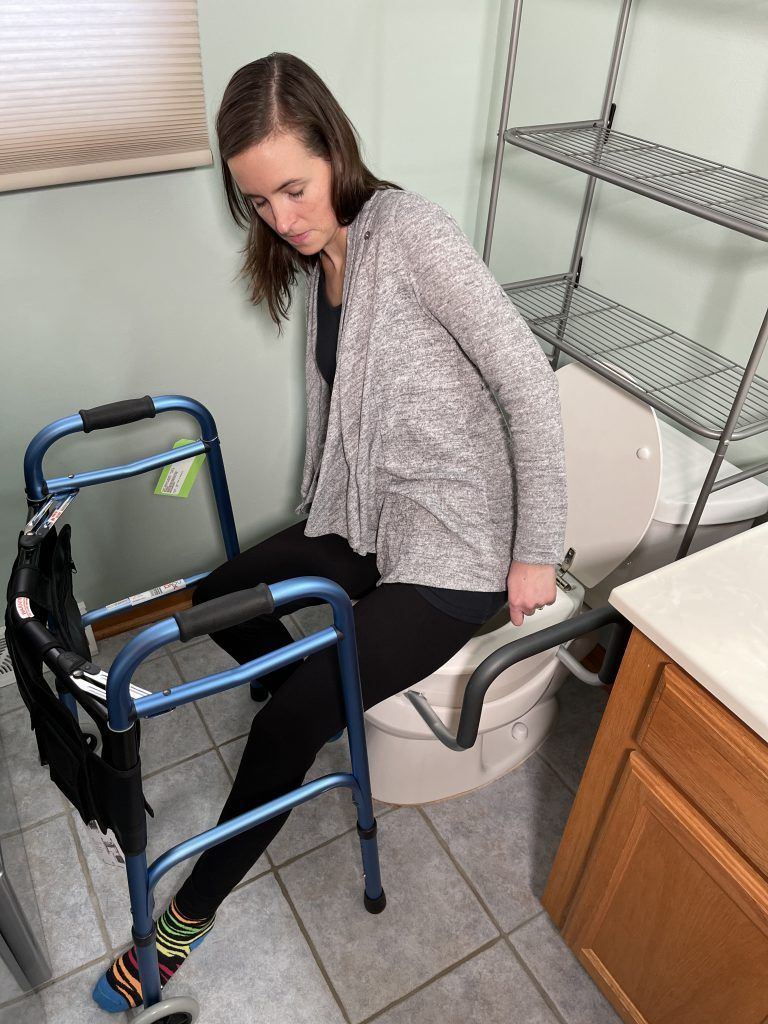
Step 4: Slowly Lower Yourself onto Toilet
Slowly lower yourself onto the toilet. Keep extending your leg out while you lower yourself down. Having a toilet seat riser allows you to keep your hip at 90 degrees or higher.
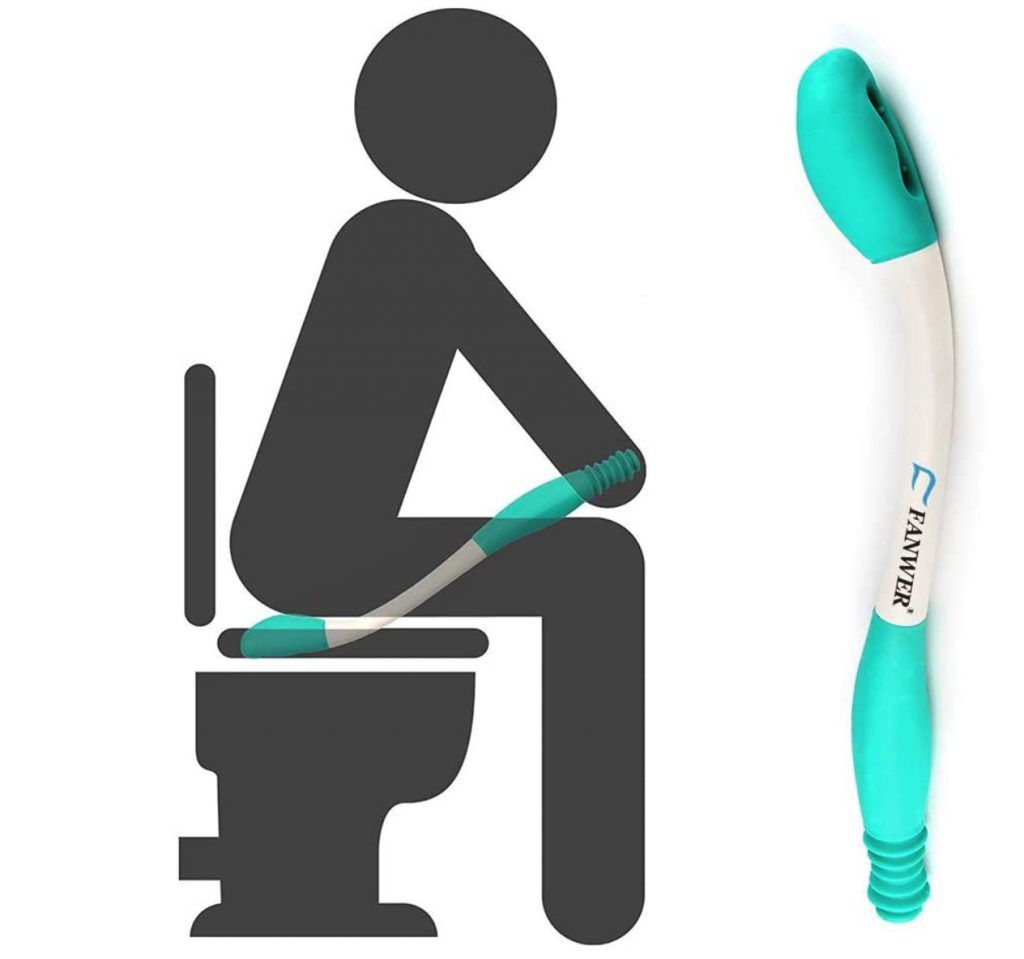
Bonus: Hygiene Recommendation
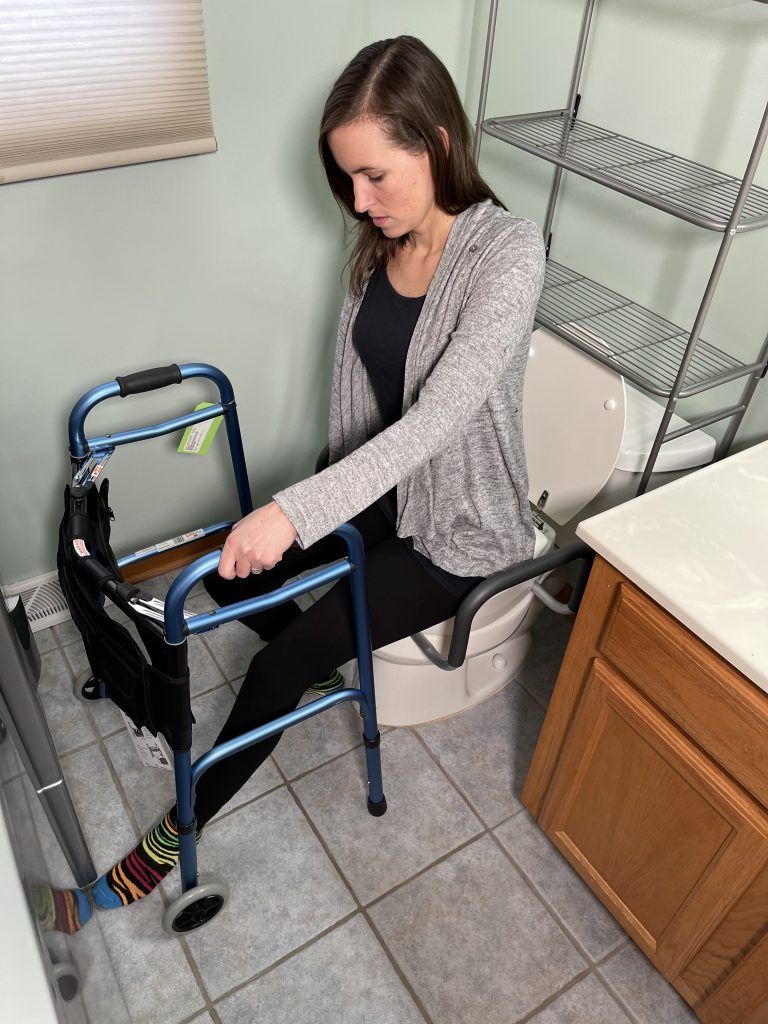
When you are done toileting, it is very important to not bend forward or twist causing your hip to bend beyond 90 Degrees.
With the side handles on the toilet seat, you can lean to one side for a side approach to hygiene.
Another great option is installing a bidet which you can do with a raised toilet seat with some careful consideration.
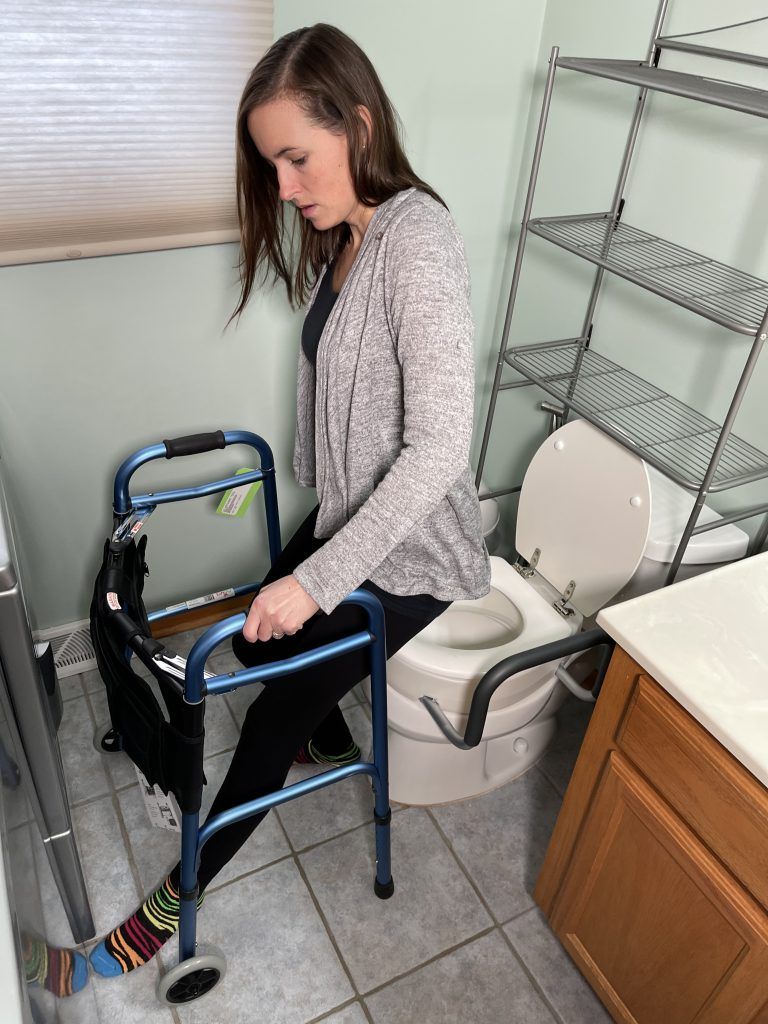
Step 4: Transfer Off of Toilet
When you are finished toileting, you still need to be careful transferring off the toilet.
To raise yourself off of the toilet, first make sure your surgical leg is extended out and your strong leg is as far back as it can go.
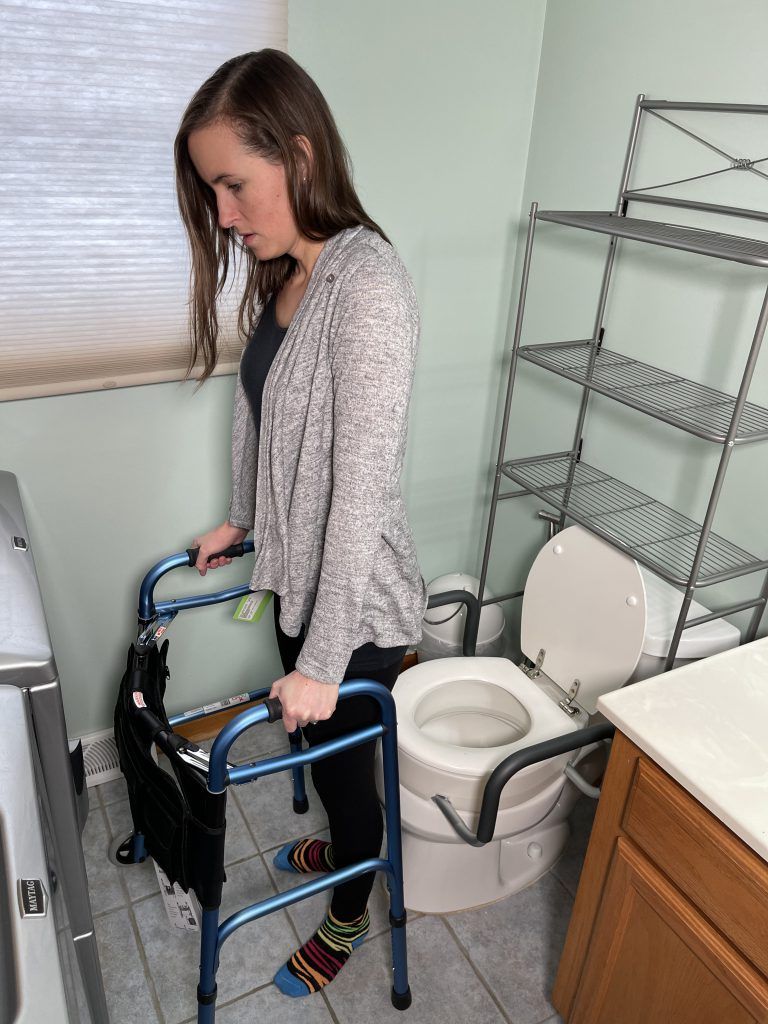
With both hands on the toilet seat handles or another sturdy surface, push yourself up and transfer one hand at a time to the walker.
Do NOT pull on the walker. Pulling on the walker may make it unstable.
That’s it! You now know how to use a toilet after a hip replacement. If you have any questions, please feel free to leave them in the comments section of my video on how to complete a toilet transfer after a hip replacement and I will try to respond back.
Note: This post contains affiliate links that provide a small commission without any added cost to the user.
*all prices are at the time of publishing
More Recent Posts…
- How to Sleep After a C-Section or Abdominal Surgery

 Recovering from a C-Section, appendectomy, abdominoplasty, or other abdominal surgery can feel overwhelming, especially when it comes to something as essential as sleep. With a tender incision and limited mobility, finding a comfortable position may seem impossible—and yet, proper rest is critical for healing! In this …
How to Sleep After a C-Section or Abdominal Surgery Read More »
- How to Get In and Out of the Car after Hip Replacement
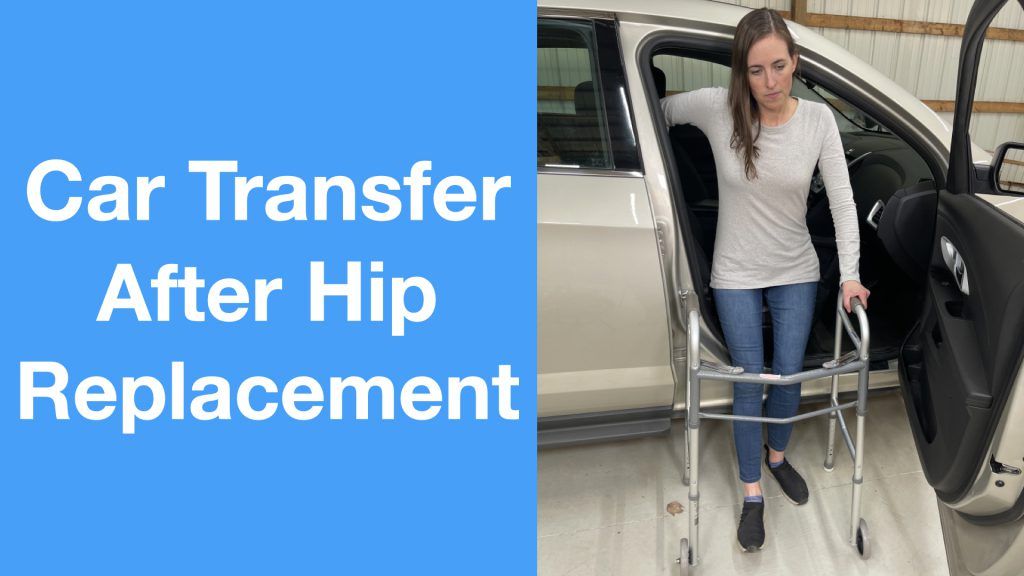 Getting in and out of a car after a hip replacement can feel like navigating an obstacle course. Ensuring you move safely and avoid unnecessary strain on your healing hip is essential for a smooth recovery. Whether you’re heading to a follow-up appointment or simply enjoying …
How to Get In and Out of the Car after Hip Replacement Read More »
- A Complete Guide to Lower Body Dressing After Hip Replacement Surgery
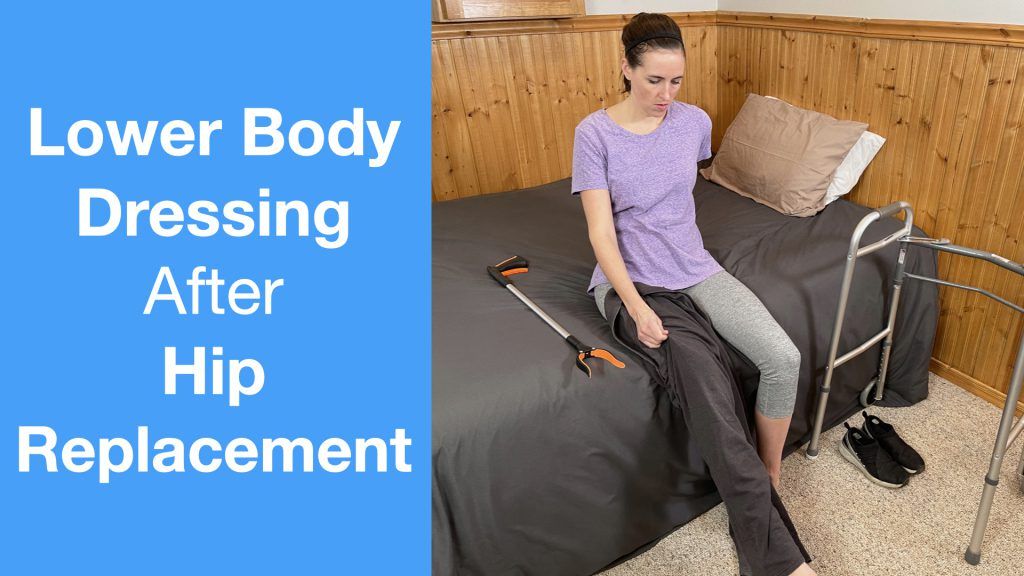 Recovering from hip replacement surgery (or similar traumatic injury) comes with its challenges, especially when it comes to everyday tasks like getting dressed. While your mobility may be temporarily limited, dressing your lower body can be made much easier with the right strategies and tools. This …
A Complete Guide to Lower Body Dressing After Hip Replacement Surgery Read More »