Bed mobility after hip replacement, or more specifically, getting in and out of bed is a common place where we see some challenges maintaining hip precautions after surgery or injury.
Maintaining your hip precautions (no bending more than 90 degrees, no crossing your legs, no pivoting on surgical leg) during all daily activities following a hip replacement is vital for full and complication-free recovery.
Fortunately, with a few simple steps, you can ensure you are getting in and out of bed safely.
And I’ll show you how.
In this guide, I do not include an adult bed rail, but if you have significant challenges getting in and out of bed prior to your surgery, consider picking one up. It will provide some additional support during your recovery and may also reduce your fall risk.
If you need help installing and using a bed assist bar, I have a full post (with photos) of how to install and use an adult bed rail.
Check out my video on my YouTube channel for a full demonstration of the technique for getting in and out of bed after hip replacement.
Overview
Estimated Time: 5 minutes
Estimated Cost: $7 (not including the walker and extra pillow)*
Tools Needed:
- Leg lifter (or alternative leg lifting tool, i.e. a belt or looped gait belt)


*all prices are at the time of publishing
Supplies Needed:
- Extra pillow for between legs
Bed Mobility after Hip Replacement – Steps:
- Gather your tools
- Place leg lifter over foot with surgical leg extended
- Lift non-surgical leg into bed
- Lift surgical leg into bed using leg lifter
- If planning on laying on side, place pillow between legs
- Place leg lifter over surgical leg and shift towards edge of bed
- Retrieve your walker and stand
Bed Mobility after Hip Replacement – Step 1: Gather Your Tools
Gather tools including a leg lifter (or alternative device if no leg lifter is available), 2-wheeled walker, and an extra pillow for between legs.
If you struggled with bed mobility prior to your hip replacement, you may want to consider the addition of a bed rail too. Here’s an example of one below:

Bed Mobility after Hip Replacement – Step 2: Place leg lifter
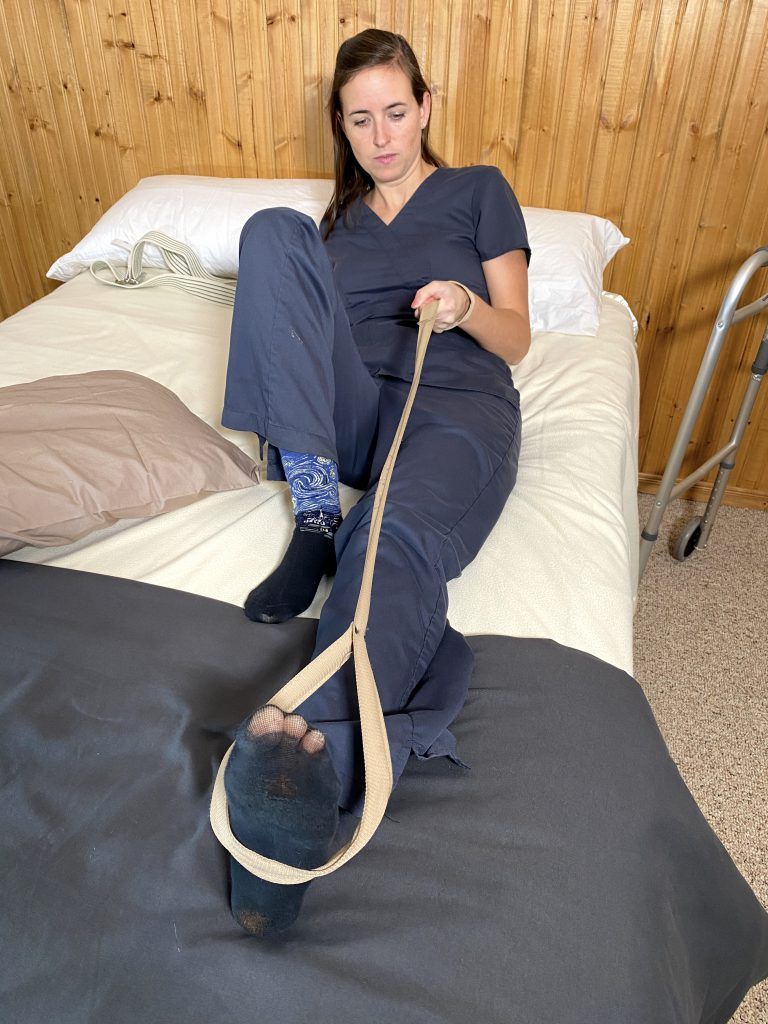
Place the leg lifter over your foot while seated at the edge of the bed.
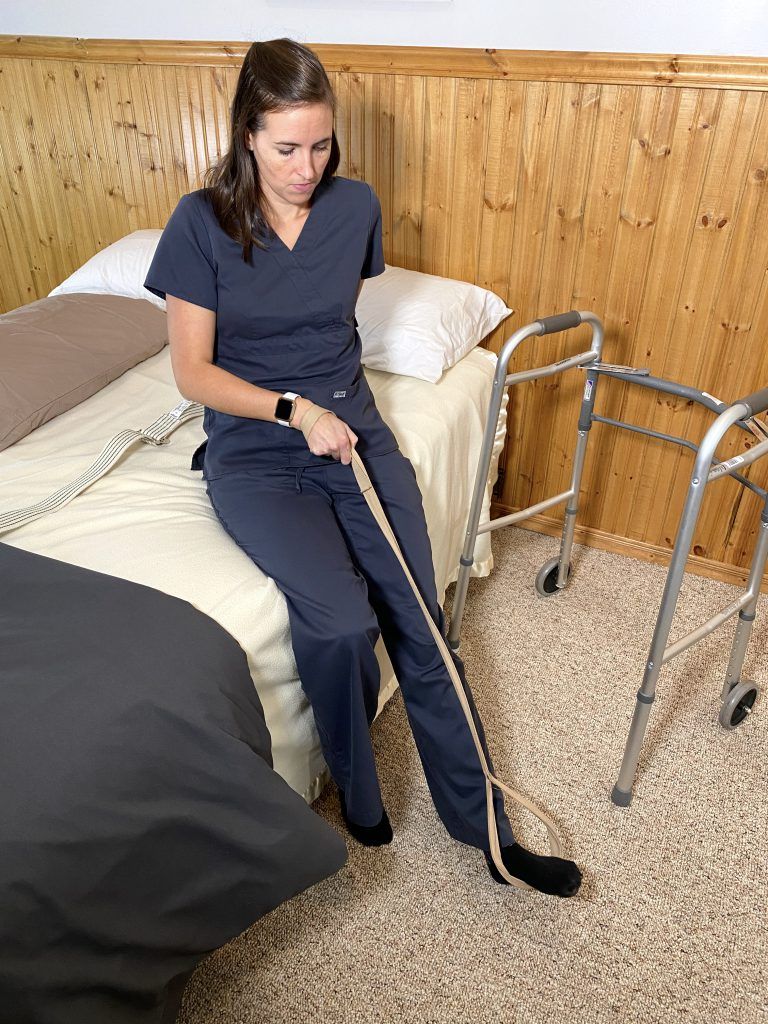
Your surgical leg should be extended and you should be slightly reclined in bed to ensure you maintain the 90 degree or greater hip angle.
Bed Mobility after Hip Replacement – Step 3: Lift non-surgical leg into bed
Pivot body to allow non-surgical leg to lift onto the the bed while maintaining surgical leg extended and pivoting your body so your head is towards the head of the bed. Use the leg lifter to assist with bringing the surgical leg towards the edge of the bed.
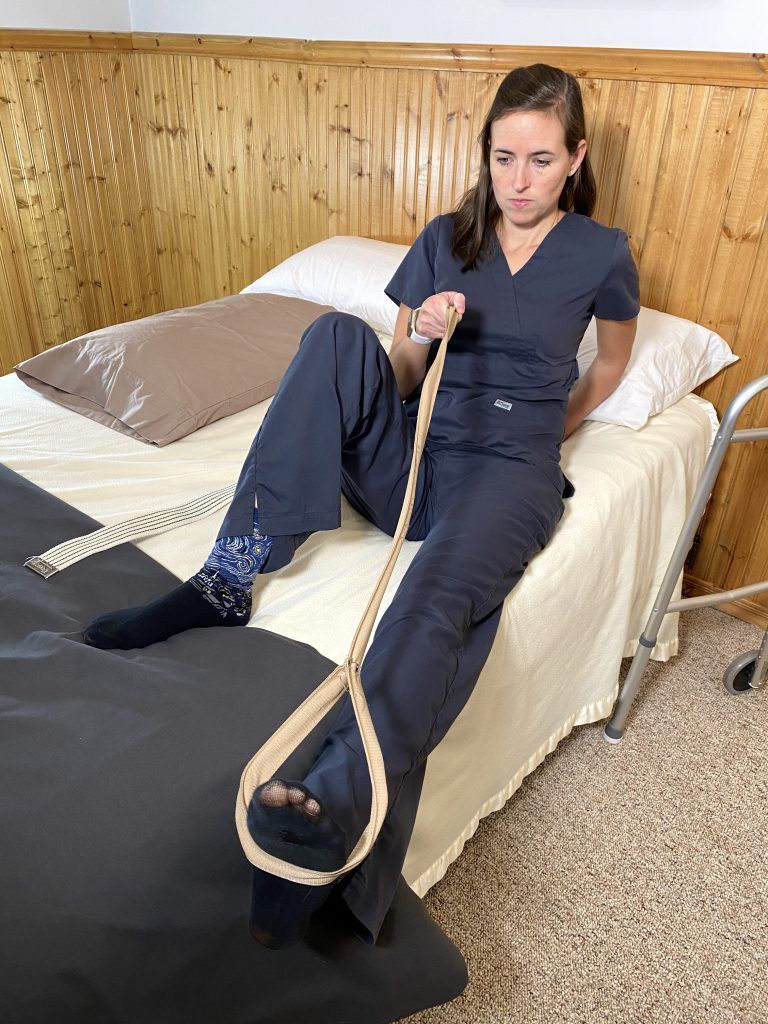
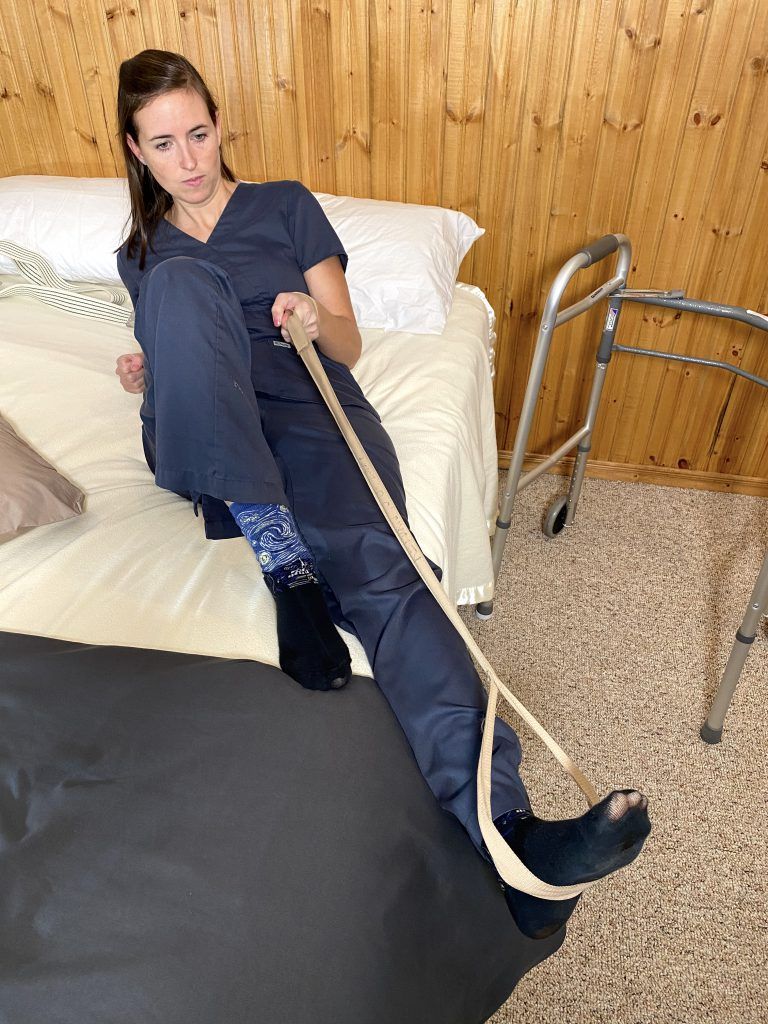
Bed Mobility after Hip Replacement – Step 4: Lift surgical leg into bed
While continuing to use your non-surgical leg to slide your body into bed, pivot while lifting your surgical leg into bed using the leg lifter. Throughout this process you should continue to be reclined with your surgical leg extended.
Bed Mobility after Hip Replacement – Step 5: If planning on laying on side, place pillow between legs
If you plan to lay on your side while in bed, or you tend to roll in your sleep, you should place a pillow between your legs to prevent accidental crossing of your legs. This is very important because crossing your legs can cause dislocation following a hip replacement.
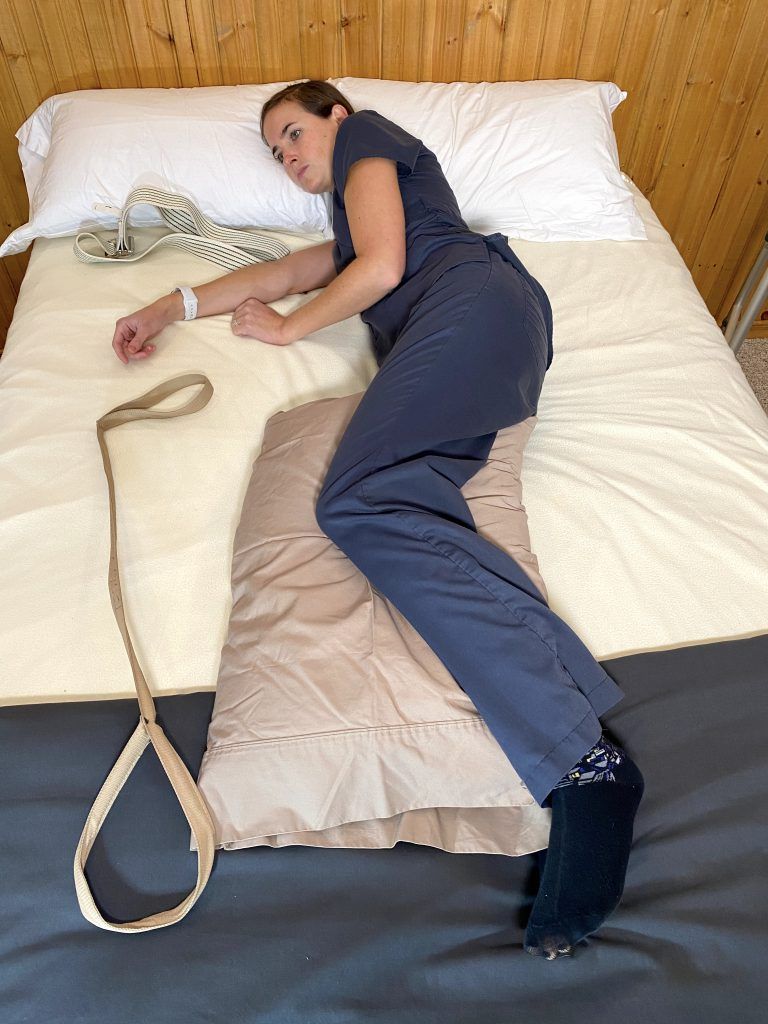
The pillow you select should be long enough and thick enough to support a normal gap between your legs while also keeping your feet from crossing accidentally.
Bed Mobility after Hip Replacement – Step 6: Place leg lifter over surgical leg and shift towards edge of bed
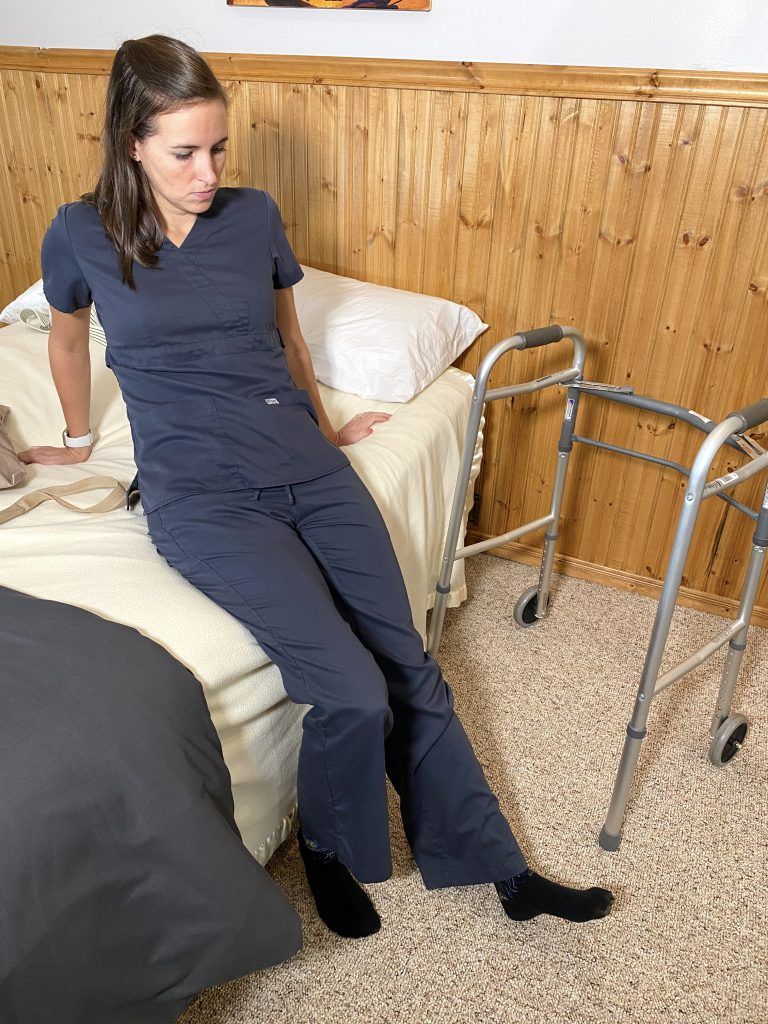
When getting out of bed, place the leg lifter back over your surgical leg and begin moving towards the edge of the bed. You will need to prop yourself up on your elbows at this time. Use your non-surgical leg to push you towards the edge of the bed.
Once your heal is off the edge of the bed you will need to begin sitting up an continue to pivot using gravity to assist with the transition to the seated position at the edge of bed.
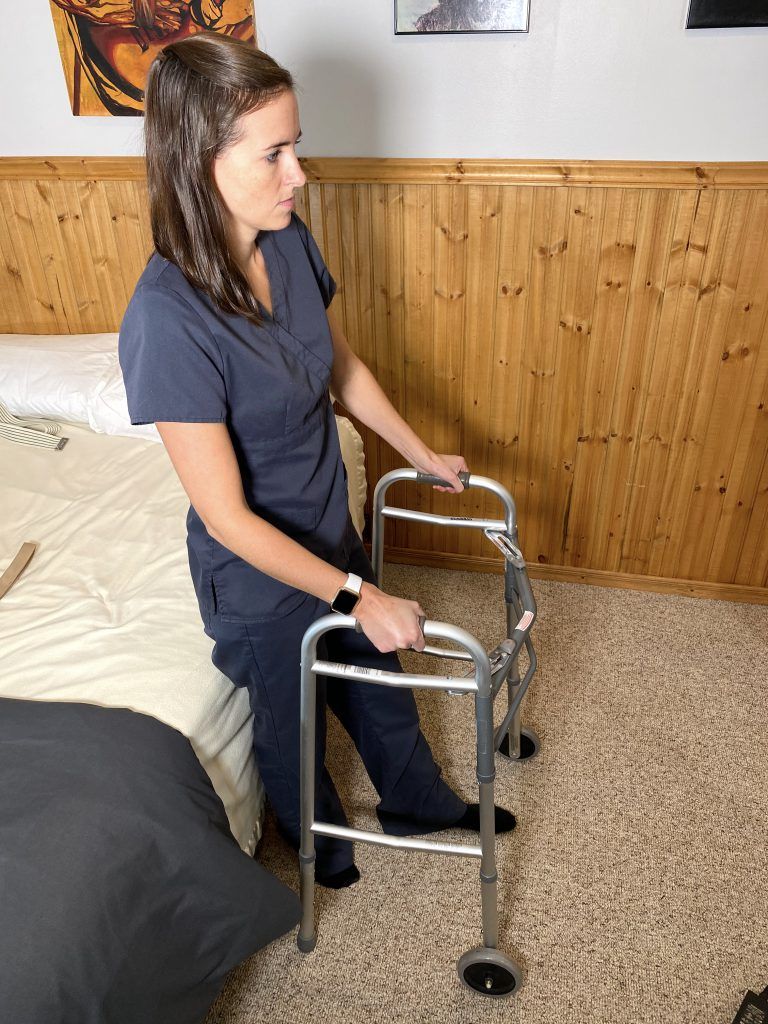
Bed Mobility after Hip Replacement – Step 7: Retrieve walker and stand
Once both feet are on the floor, retrieve the walker and place it in front of yourself.
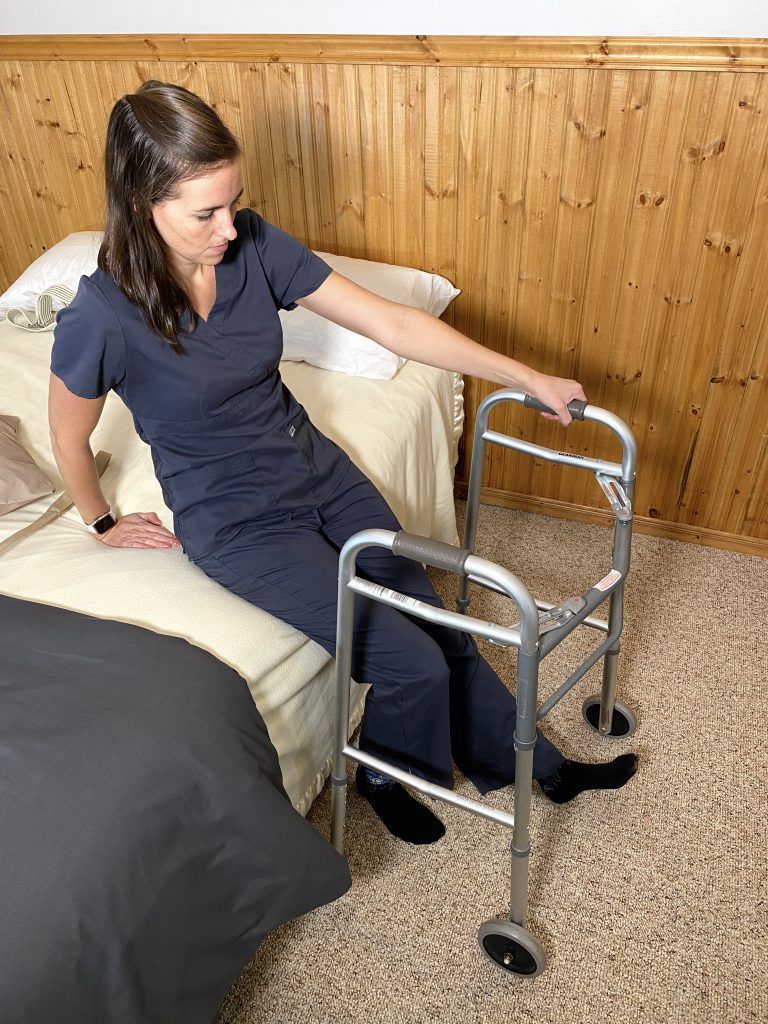
When attempting to stand, make sure not to reach forward and break your 90 degree angle. Instead, keep your surgical leg extended and place your hand on the non-surgical side behind you and your non-surgical leg squarely underneath you. Push up from the bed with one hand while resting your surgical hand on the walker for balance.
That’s it. We have now covered how to get in and out of bed safely after a hip replacement. Hope this was helpful!
Note: This post contains affiliate links that provide a small commission without any added cost to the user.
More Recent Posts
- How to Sleep After a C-Section or Abdominal Surgery

 Recovering from a C-Section, appendectomy, abdominoplasty, or other abdominal surgery can feel overwhelming, especially when it comes to something as essential as sleep. With a tender incision and limited mobility, finding a comfortable position may seem impossible—and yet, proper rest is critical for healing! In this …
How to Sleep After a C-Section or Abdominal Surgery Read More »
- How to Get In and Out of the Car after Hip Replacement
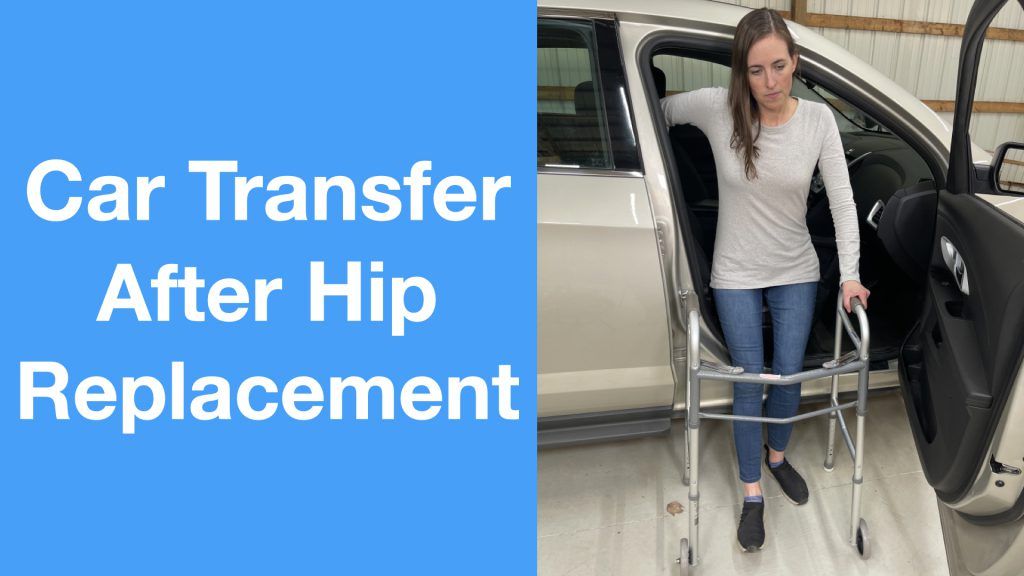 Getting in and out of a car after a hip replacement can feel like navigating an obstacle course. Ensuring you move safely and avoid unnecessary strain on your healing hip is essential for a smooth recovery. Whether you’re heading to a follow-up appointment or simply enjoying …
How to Get In and Out of the Car after Hip Replacement Read More »
- A Complete Guide to Lower Body Dressing After Hip Replacement Surgery
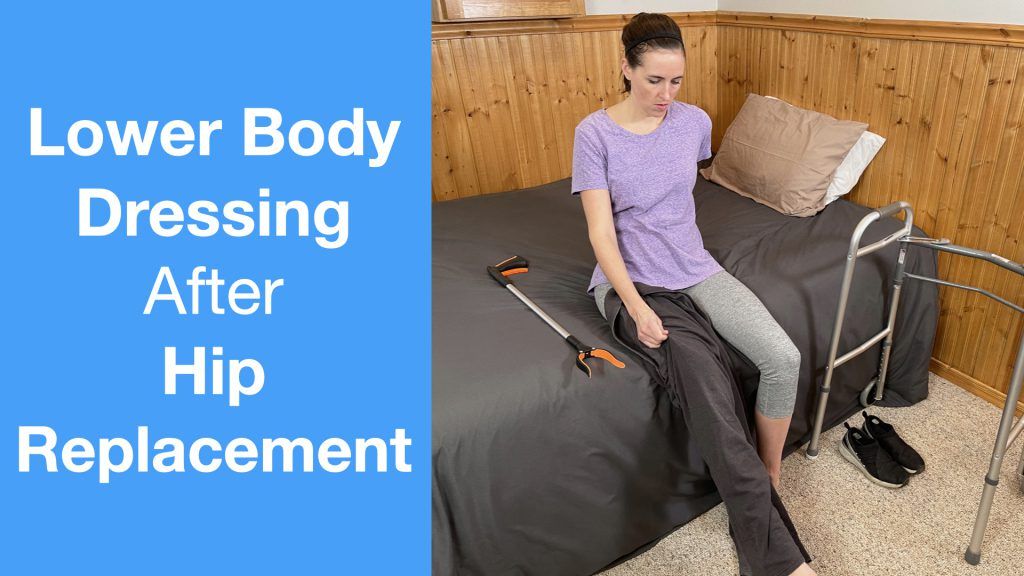 Recovering from hip replacement surgery (or similar traumatic injury) comes with its challenges, especially when it comes to everyday tasks like getting dressed. While your mobility may be temporarily limited, dressing your lower body can be made much easier with the right strategies and tools. This …
A Complete Guide to Lower Body Dressing After Hip Replacement Surgery Read More »