
Showering following a hip replacement can be daunting when attempting to follow all the hip precautions, stay safe from falls, and managing to get clean!
I understand. I’ve worked with many patients who struggle with showering after a hip replacement.
So, I wanted to put together a helpful post about the details for setting up your shower environment, equipment to use, and how to position your body safely if you are using a tub/shower combination.
If you prefer a video tutorial, check out my YouTube channel to see the whole process in action!
Supplies Needed:
Steps:
- Remove glass shower doors (if your shower already has a regular shower curtain, skip to step 2)
- Install your tub transfer bench
- Retrieve your long handled sponge and hand-held shower head and set them in reach
- Complete your transfer using the 2-wheeled walker, tub bench, and leg lifter
- Finish your shower
- Complete your transfer out of the shower using the leg-lifter and tub bench
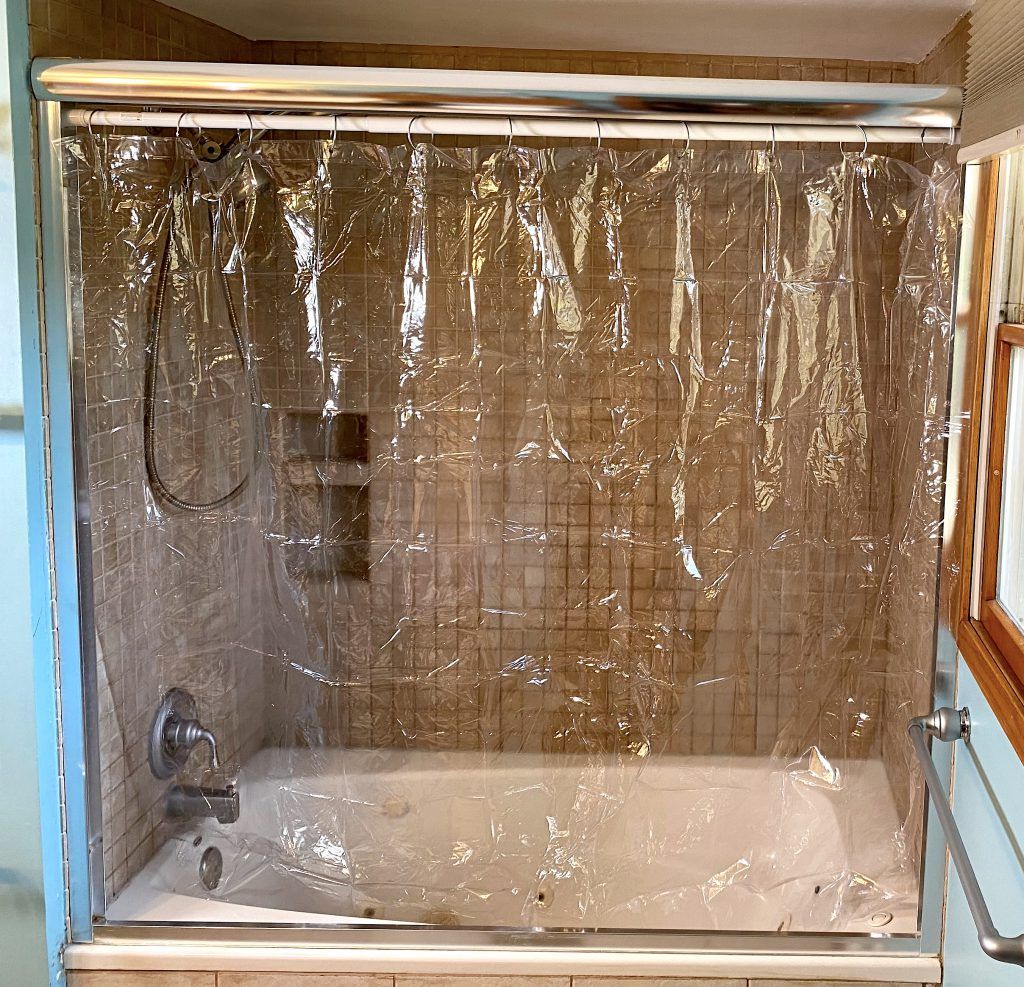
Showering after Hip Replacement – Step 1: Remove Glass Shower Doors
OK, the first step is only necessary if you have glass shower doors.
If your shower is like mine, it has glass shower doors. These will need to be removed before setting up for your shower.

I removed my shower doors and replaced with an inexpensive tension rod and plastic shower curtain.
An awesome trick of the trade to prevent water from getting on the floor, is to cut a slit in your shower curtain the width of the tub bench.
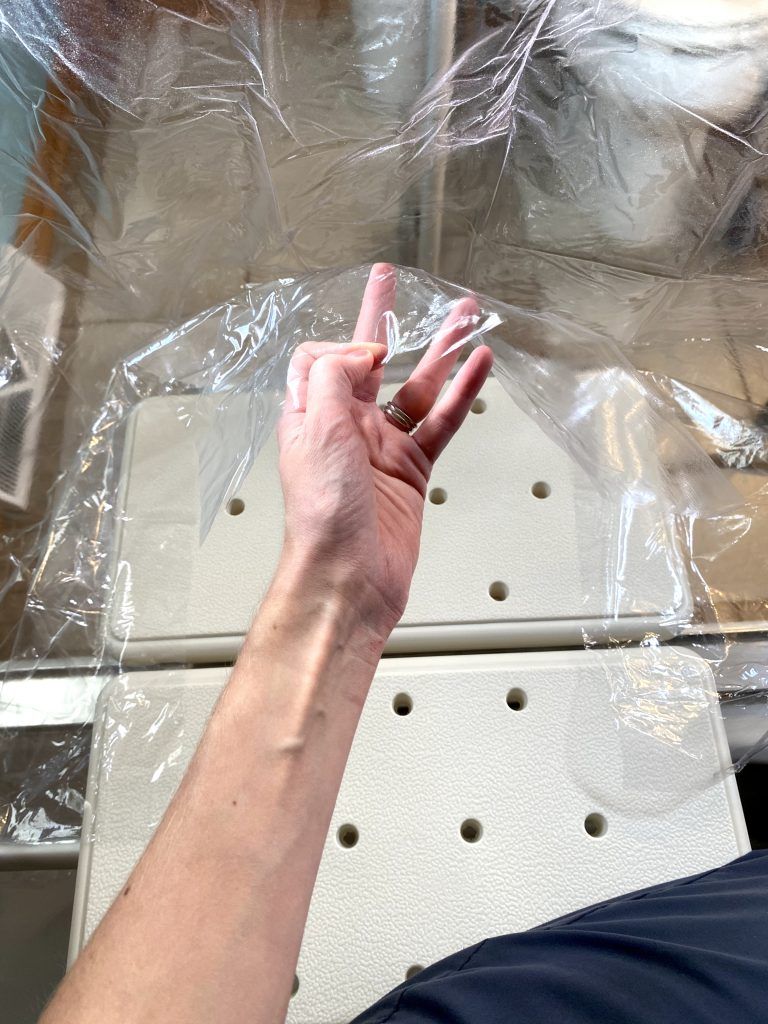
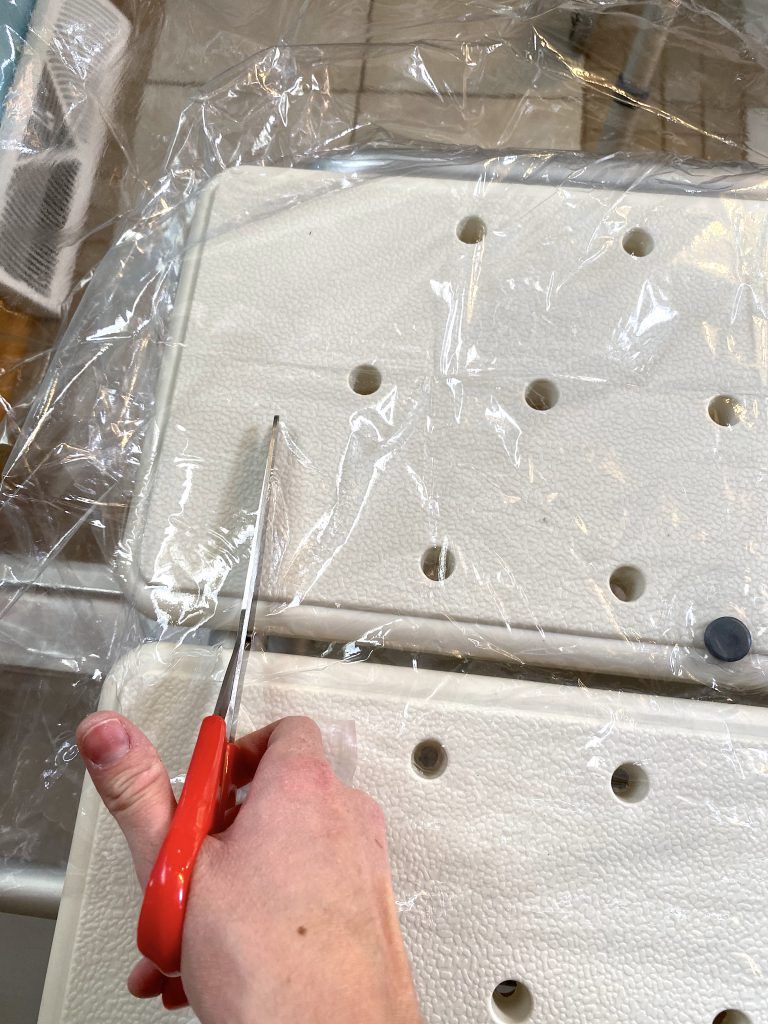
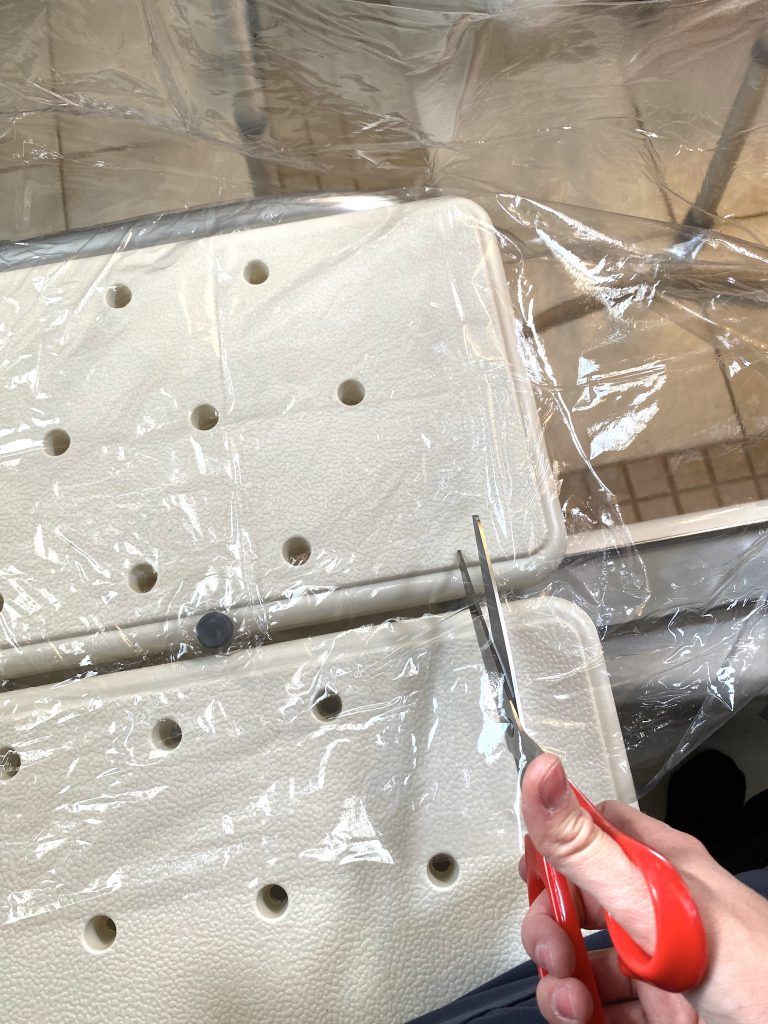
You can then slide the cut section of the curtain down between the section of the bench that extends out of the shower.
If you would like to see a video of this technique, I have a YouTube video that explains all about it.
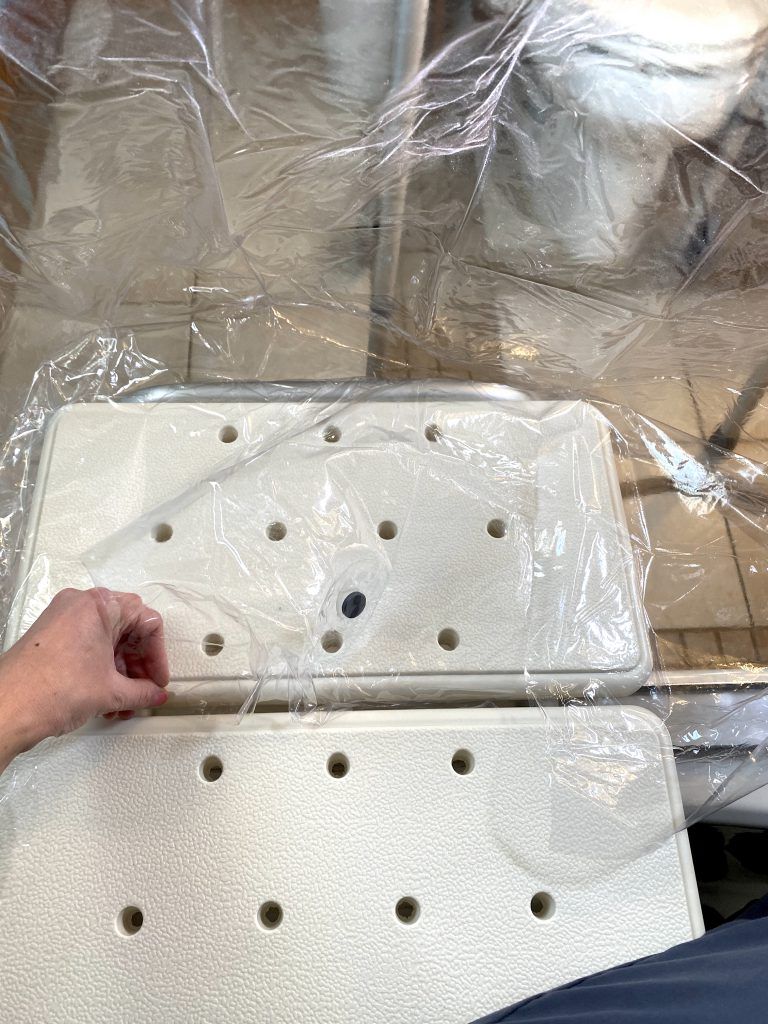
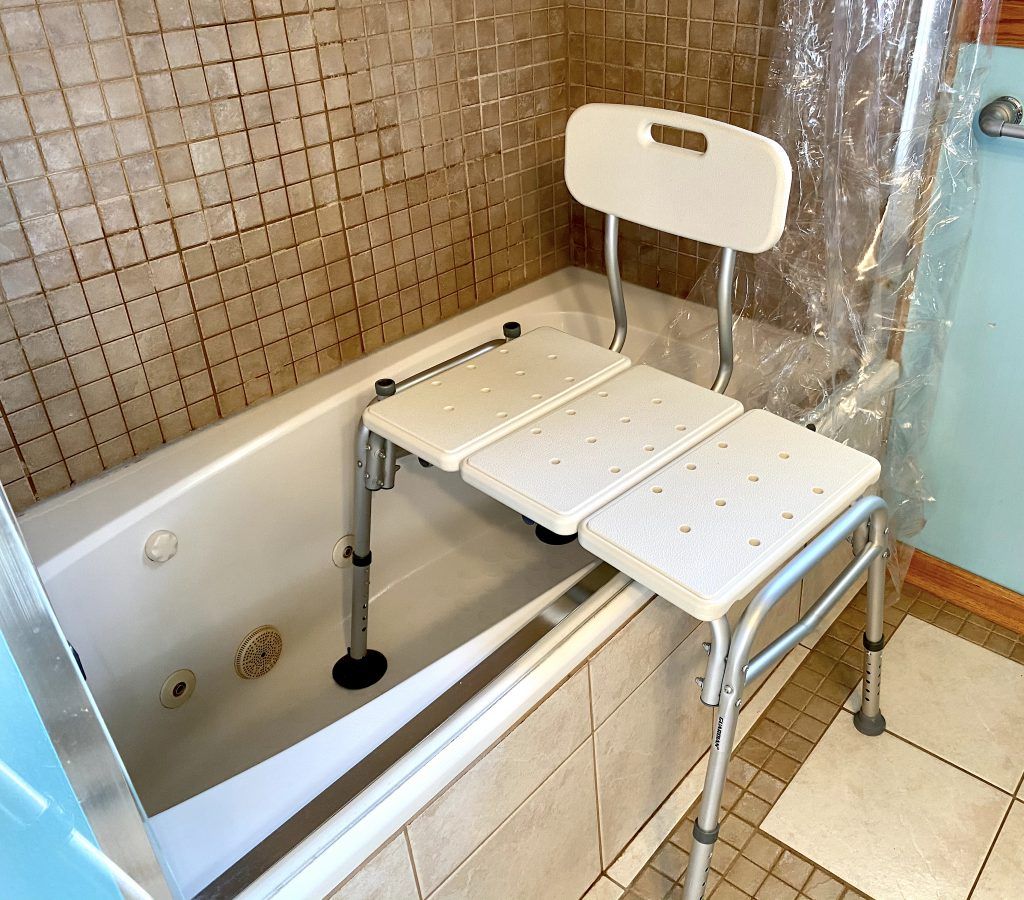
Showering after Hip Replacement – Step 2: Install Tub Transfer Bench
If you already have a plastic shower curtain or you have setup your shower curtain, then the next step is to setup and install your tub transfer bench. We’ll go over some of the details here, but we go into even more details in a different post about how to install a tub bench.
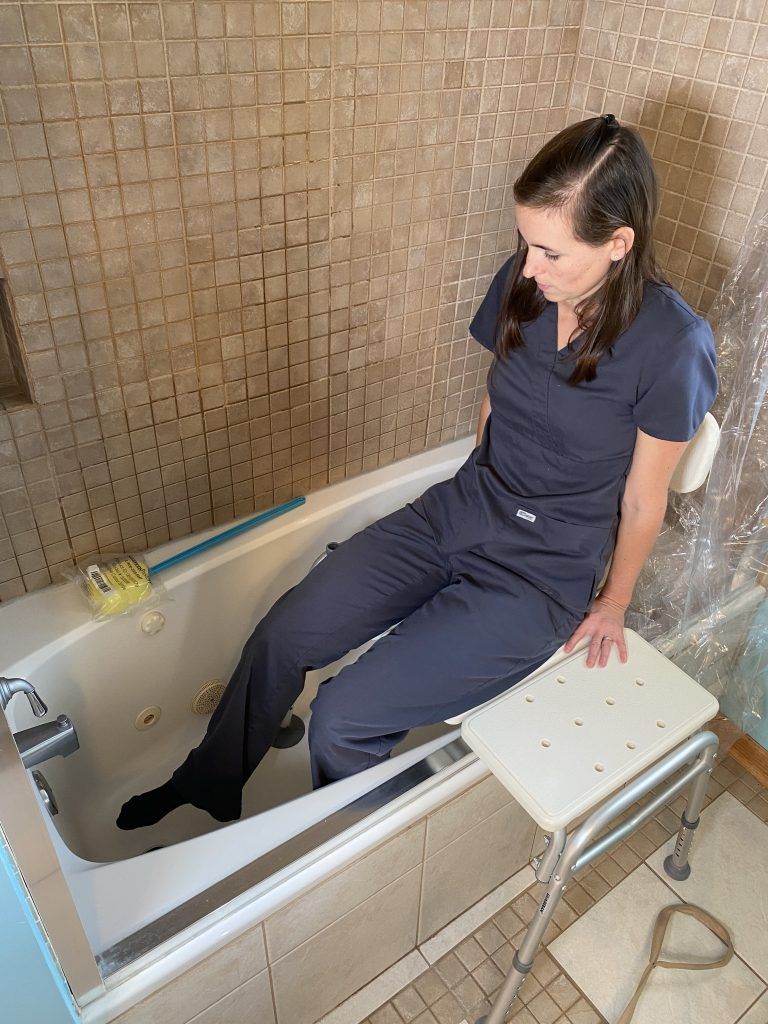
The tub transfer bench needs to be installed, so that there is enough room to maintain a slight level of recline. A recline is necessary to ensure you stay at 90 degrees of hip flexion or greater throughout the transfer and bathing process.
I placed my bench about halfway back in the tub. If you are taller, you may need to place it farther back in the tub.
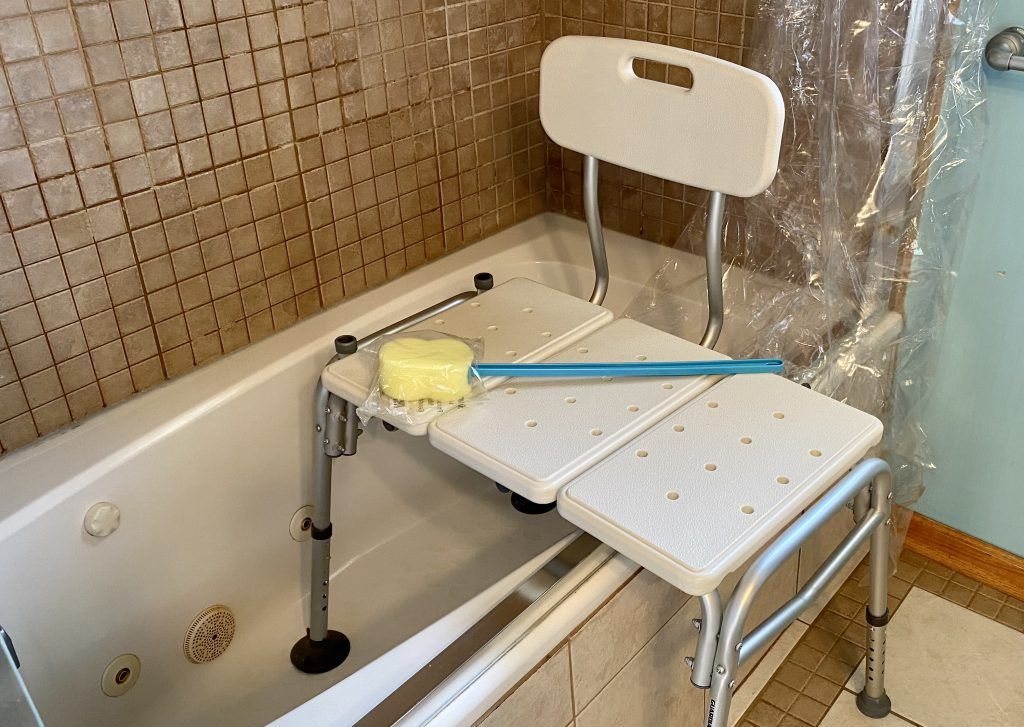
Showering after Hip Replacement – Step 3: Retrieve supplies
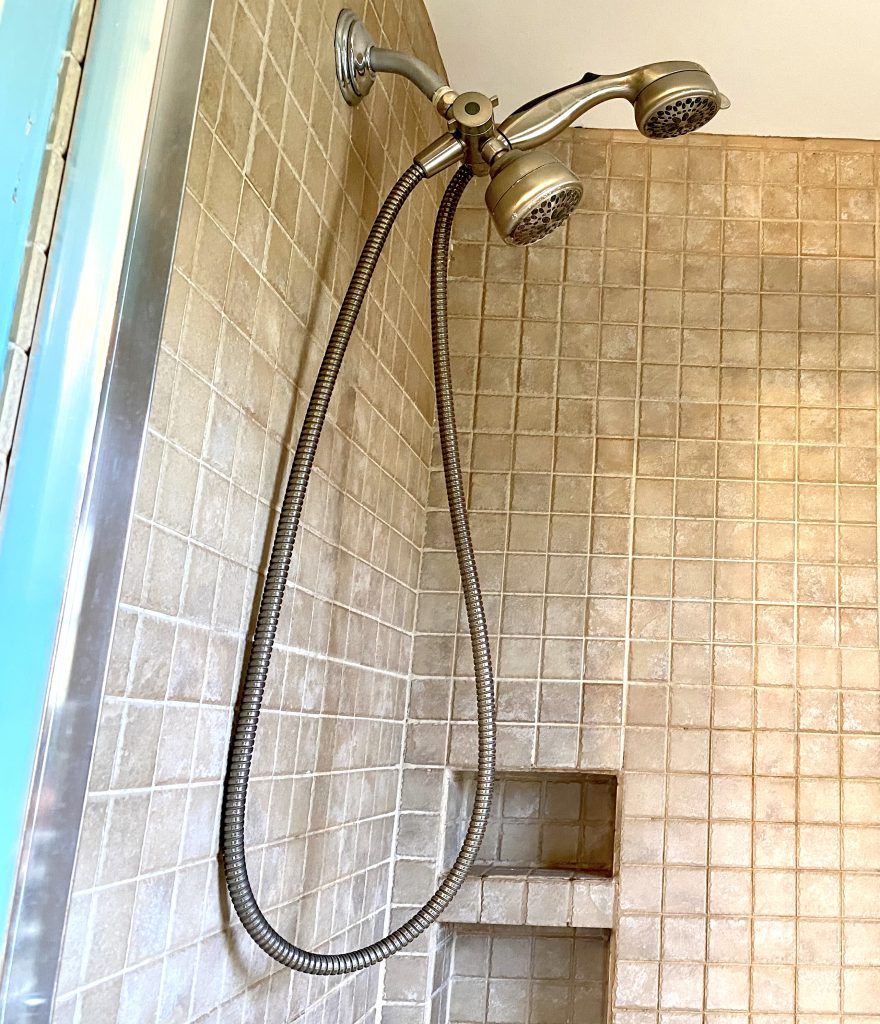
It’s always important to have your supplies ready before starting your shower. The supplies you will need once in the shower will be a long handled sponge and a hand held shower head.
If you do not have a hand held shower head in your shower, I would highly suggest installing one prior to having your hip replacement surgery. A handheld shower head is incredibly useful if you will be seated for your bathing, which most people are for several weeks after having a hip replacement surgery.
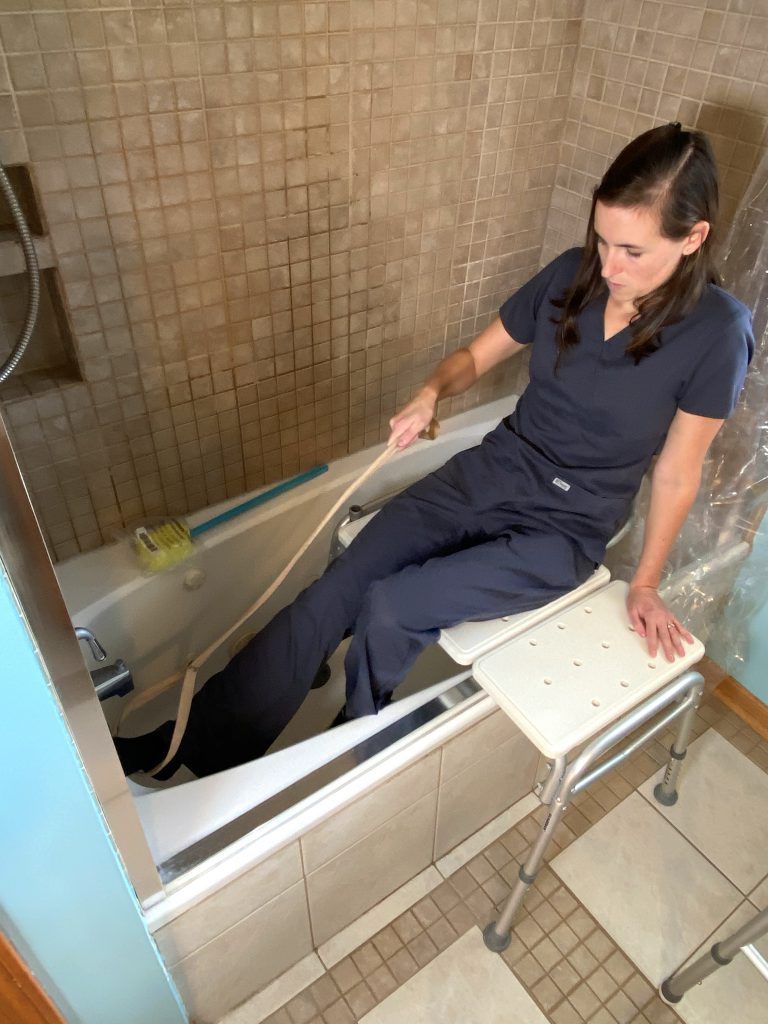
Showering after Hip Replacement – Step 4: Complete Your Transfer
The actual shower transfer will be completed using the tub bench and the leg lifter. If a caregiver is present and able to assist, the leg lifter may not be needed.
To ensure you maintain your hip precautions, you will need to maintain greater than 90 degrees of hip flexion by reclining slightly while you lift your leg over the edge of the tub.

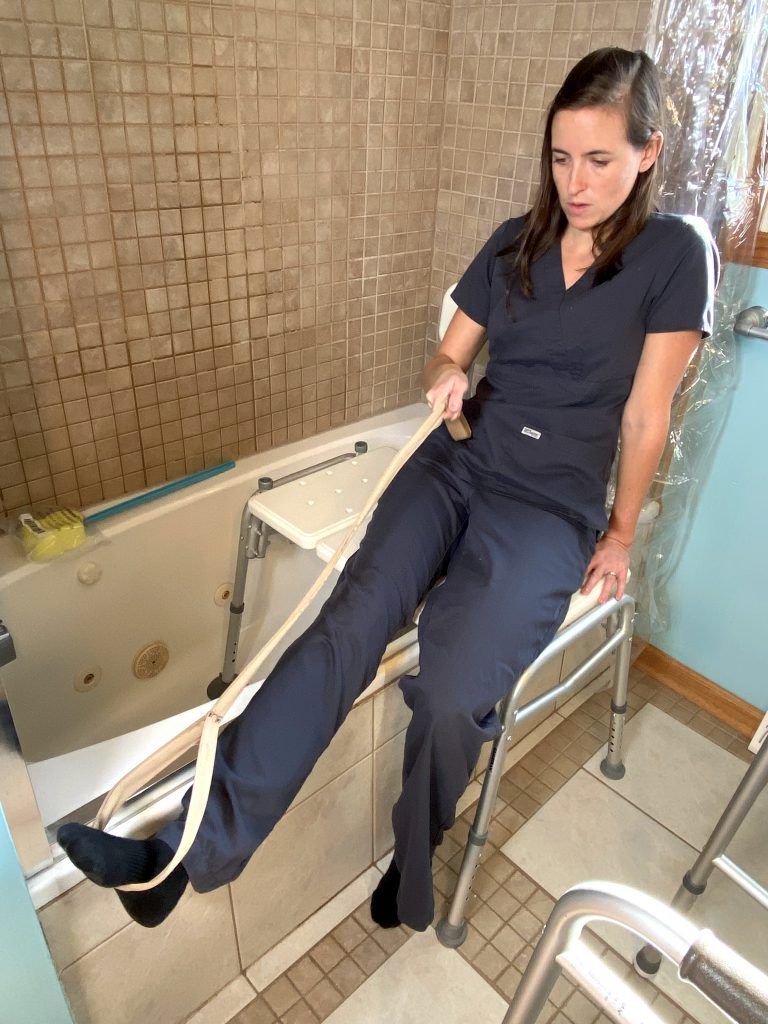
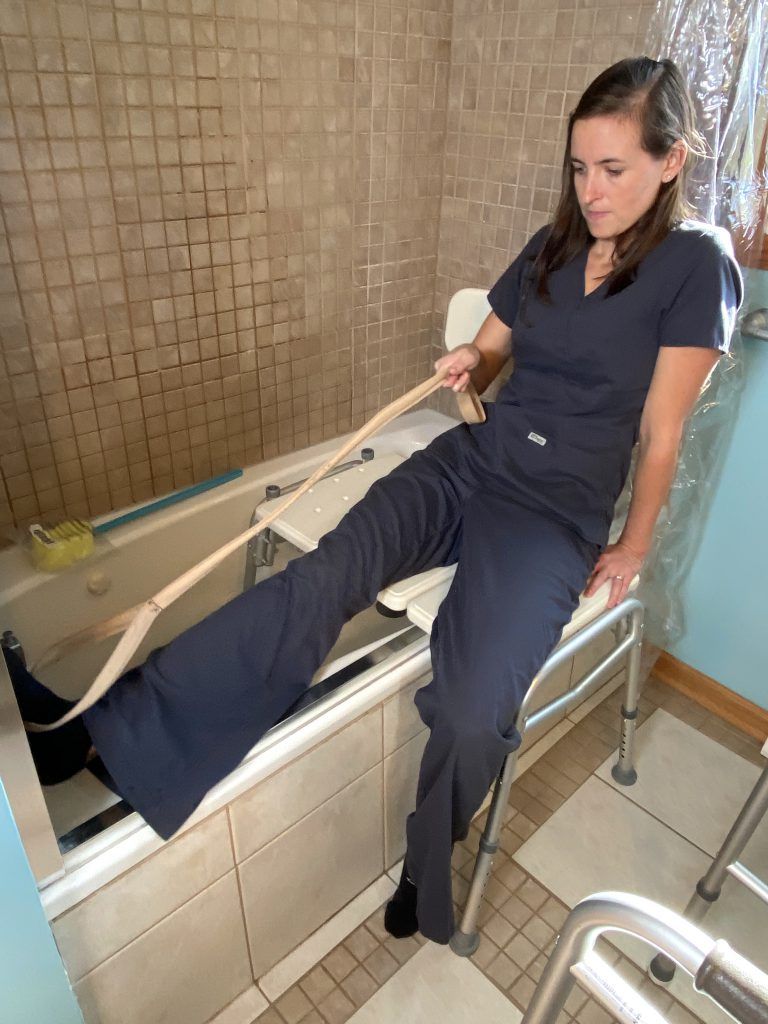
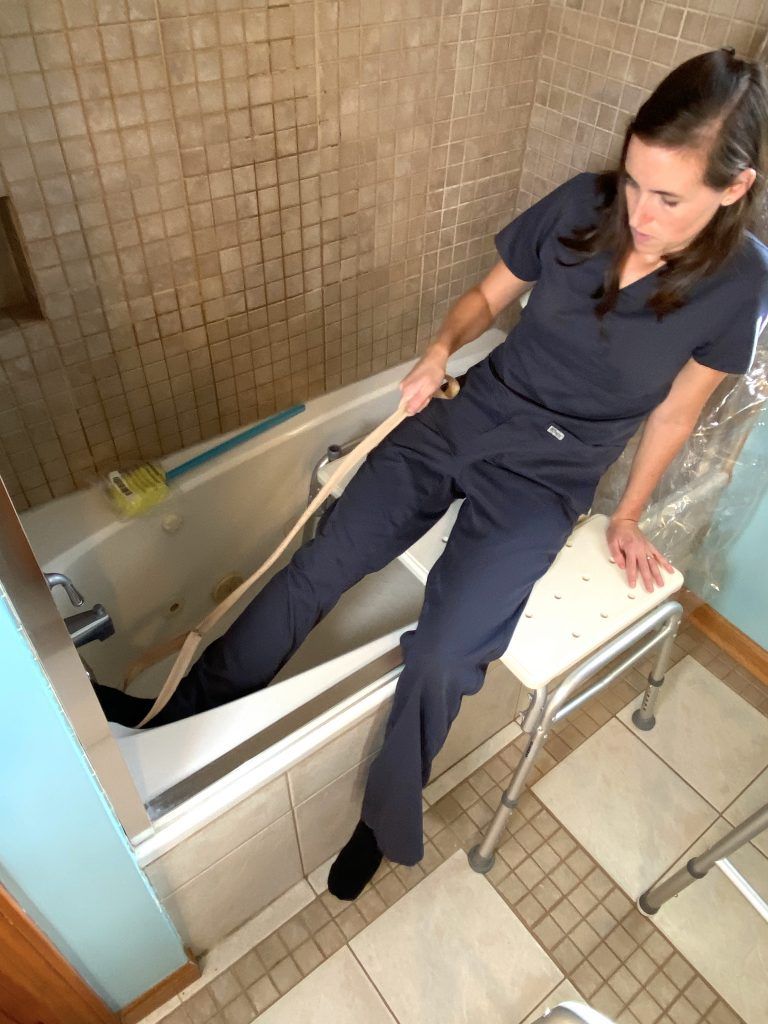
Once you have transferred one leg into the tub with the leg lifter, you can transfer the other leg into the tub ensuring you maintain the same hip precautions.
Showering after Hip Replacement – Step 5: Complete shower
Use the hand held shower head and long handled sponge to complete your shower. Make sure to avoid bending at the hips to reach below your waist to ensure you maintain your hip precautions.
A note about showering with your surgical wound: If your surgical wound still has staples or is generally open and in the early stages of healing, you will not want to get the wound very wet. You can still bathe, but you will need to make sure the wound is covered with a water proof bandage. Most surgeons are OK with a small amount of water getting on the wound, but it should not be soaked. The general rule is to keep the wound mostly dry until it is free of open areas and all scabs have fallen off. If you get the wound wet, make sure you pat it dry gently, but don’t rub, to prevent irritation.
Showering after Hip Replacement – Step 6: Transfer out of the shower
I typically recommend drying your body as thoroughly as possible before attempting to get out of the tub. I recommend this to make sure your slide over the tub bench without too much resistance.
If you are finding yourself sticking to the tub bench, dry your bottom and the bench as well as possible. Then, slide a towel under your bottom. The towel will help you slide over the bench with greater ease.
When transferring out of the shower, use the same strategy you used to get in, but in reverse. Use your leg lifter while in partial recline to elevate your leg over the edge of the tub while sliding over on the tub bench.
That’s it!
Note: This post contains affiliate links that provide a small commission with no additional costs to the user.
More Recent Posts…
- How to Sleep After a C-Section or Abdominal Surgery

 Recovering from a C-Section, appendectomy, abdominoplasty, or other abdominal surgery can feel overwhelming, especially when it comes to something as essential as sleep. With a tender incision and limited mobility, finding a comfortable position may seem impossible—and yet, proper rest is critical for healing! In this …
How to Sleep After a C-Section or Abdominal Surgery Read More »
- How to Get In and Out of the Car after Hip Replacement
 Getting in and out of a car after a hip replacement can feel like navigating an obstacle course. Ensuring you move safely and avoid unnecessary strain on your healing hip is essential for a smooth recovery. Whether you’re heading to a follow-up appointment or simply enjoying …
How to Get In and Out of the Car after Hip Replacement Read More »
- A Complete Guide to Lower Body Dressing After Hip Replacement Surgery
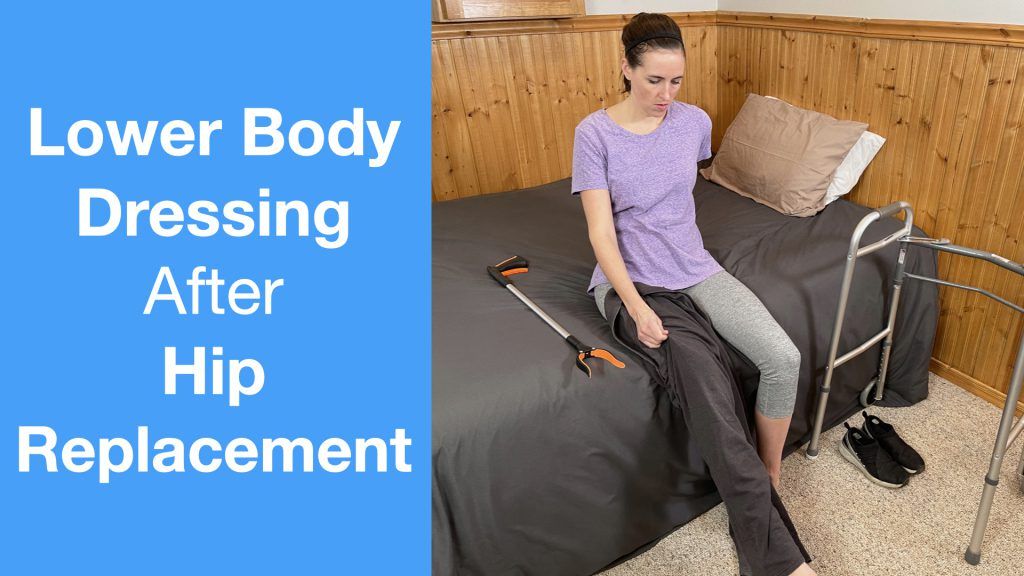 Recovering from hip replacement surgery (or similar traumatic injury) comes with its challenges, especially when it comes to everyday tasks like getting dressed. While your mobility may be temporarily limited, dressing your lower body can be made much easier with the right strategies and tools. This …
A Complete Guide to Lower Body Dressing After Hip Replacement Surgery Read More »