Adding medical equipment to a toilet is a common task for anyone living at home recovering from surgery or taking care of a loved one at home. You will often need to replace your toilet seat in order to fit medical equipment to your toilet.
This task is so common, I thought I would provide a helpful guide to replacing a toilet seat in order to prepare your toilet for medical equipment.
I will provide the necessary steps for updating your toilet seat in the scenario that the existing toilet seat does not have the standard bolt setup for medical equipment. The most common after market medical equipment that require this change is the raised toilet seat.
If you prefer video instructions, I have a YouTube for this guide all about how to replace a toilet seat for medical equipment.
But if you prefer written instructions, no problem! Let’s get started.
Replace a Toilet Seat – Tools Needed
- Phillips or flat head screw driver (will depend on type of toilet seat purchased)
Please note: Before we begin, please make sure you follow all the instructions and warnings provided by the manufacturer. The steps below are only to provide guidance with installing or assembling equipment, but you should always follow the warnings and instructions provided by the manufacturer.
Replace a Toilet Seat – Steps
- Buy a New Toilet Seat
- Remove Old Toilet Seat
- Place Toilet Seat
- Install Toilet Seat Bolts
- Safety Check
Toilet Seat Replacement – Step 1: Buy new toilet seat
As I stated earlier, we have a toilet in our house which does not use the standard bolt setup that is required for use of medical equipment.
When I realized my toilet seat had this type of back mount, I went to the store to find a new one to replace our current toilet seat. I went to Lowe’s in our case because it is close by, but of course, you can buy a toilet seat at most hardware stores or online.
I found a very inexpensive ($9) replacement seat by AquaSource. It is for a round toilet, also known as a standard toilet seat. There are toilet seats that fit “elongated” style toilets as well. So, in order to replace your own toilet seat, you need to know what type of toilet you’re working with, standard or elongated.
Replace Toilet Seat – Step 2: Remove Old Toilet Seat
Now that we have the toilet seat we need to remove the toilet seat from the toilet. It’s really simple. On the back of your toilet seat where it is mounted, underneath where it is attached, you should feel two long bolts with nuts.
These nuts are actually made out of plastic. And they’re meant to be really quite easy to remove. I was able to hand loosen them.
So let’s go ahead, and pop these off. We’re going to hold onto them in case we want to reinstall this toilet seat at another time.
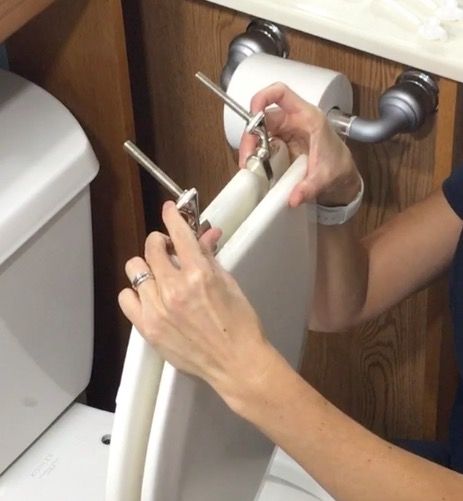
You can see in the picture above of our old toilet seat, we’ve got two bolts that are actually all part of the back system. They are actually integrated into the toilet seat mount. These integrated bolts make this seat incompatible with medical equipment like a toilet seat riser. If you are curious, we did write a post about installing a raised toilet seat.
Unlike this replacement that I’ve purchased, you’re going to see the toilet seat has a separate plastic piece with flip out covers over the bolts.
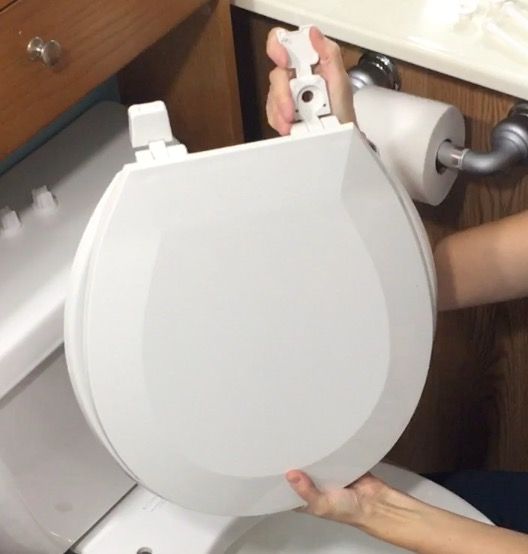
You’re going to open these up, and you see the hole is there, and these will accommodate the bolts that come along with your medical equipment. They usually come with their own bolts.
But if you were to use a piece of medical equipment, you’d be using the medical equipment that came along with it, including the bolts, and the nuts.
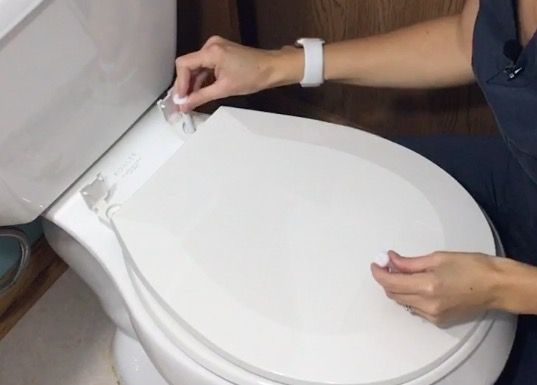
Replace Toilet Seat – Step 3: Place new seat:
Our new toilet seat comes with two rubber gaskets. These gaskets should go in first into the holes on the back of the toilet bowl.
Now, you’re going to set your toilet seat in place. The old on the new toilet seat should line up with the holes on the back of the toilet. Make sure they line up so you can fit bolts through them
Replace Toilet Seat – Step 4: Install Toilet Seat Bolts
You should have had two bolts that came with your toilet seat. Most of them are plastic. Find those two bolts that came with your
The bolts included with our toilet seat are Phillips head bolts. So, I did grab a Phillips head screwdriver, which is recommended for installation.
We’re going to drop the new bolts into the two holes on the back of the toilet seat and the toilet.
Similarly to my old toilet seat, the new toilet seat came with two plastic nuts. We’re going to place the nuts on the bolts on the underside of the toilet. Give them a twist and start tightening them in place.
Very simple.
You can use your screwdriver to hold the bolts in place. A little more ergonomic to try and fasten them in place and could be a little faster. Tighten the nuts to hand tight only.
Do not over torque the bolts. Over-torquing the bolts could cause them to break or cause your new toilet seat or toilet to crack.
Replace Toilet Seat – Step 5: Safety Check
Before you use your new toilet seat, it is important to check it for safety. Test the seat to make sure it is stable. Try sitting on the new seat and try standing up, it should be comfortable and stable.
Now, the job is complete!