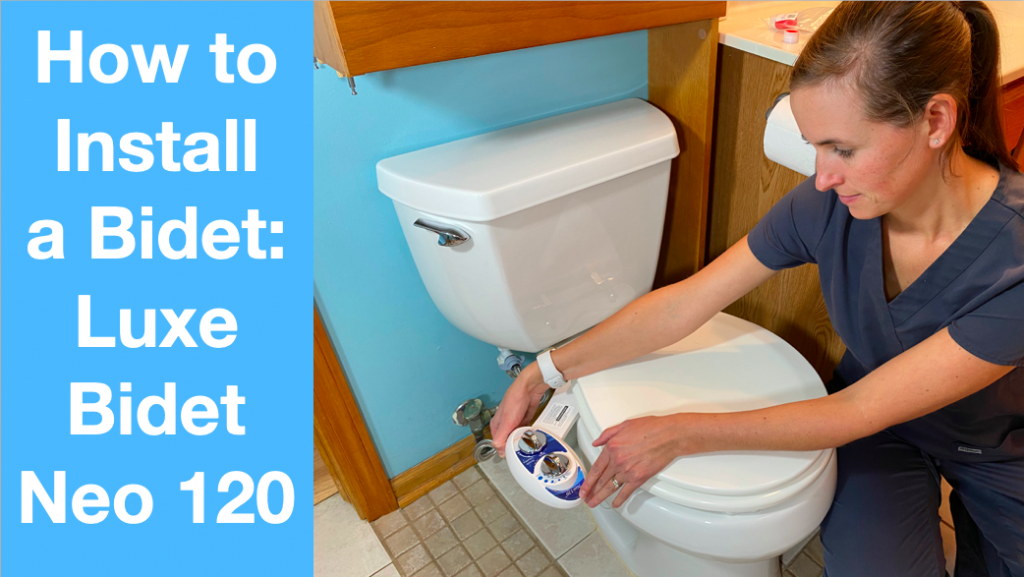
The Luxe Bidet Neo 120 is the most common and highest reviewed bidet on Amazon. Bidets themselves have gained significant popularity over recent years and are a wonderful option for anyone looking for alternative means for toilet hygiene.
Installing a bidet can be cost effective, environmentally friendly, and health promoting. The Neo 120 is the base model sold by Luxe Bidet and is the easiest to install and the most cost effective. No plumber required for installation of this bidet!
Installing a bidet in your bathroom may be beneficial for certain health conditions like chronic neck or back issues that limit bending and twisting and neurological or orthopedic conditions that limit hand and arm dexterity or strength.
As an Occupational Therapist working in patients’ home, I have recommended the installation of a bidet in many situations with incredible outcomes that improve quality of life and overall independence during a person’s most private activities.
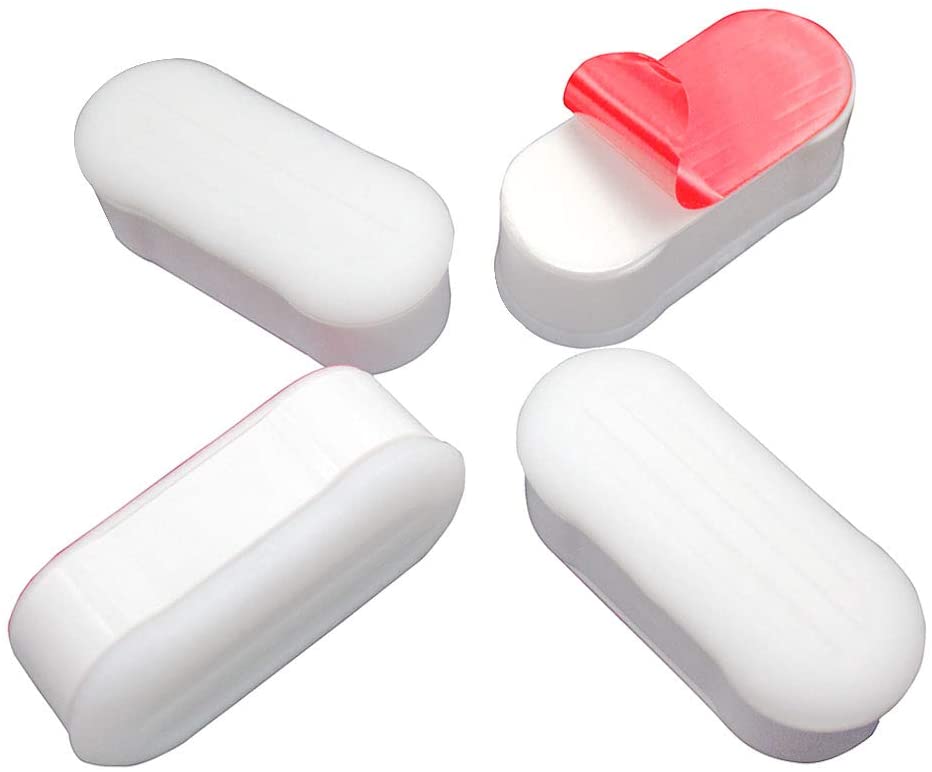
But the installation process can be a little tricky, so I put together this guide for installing the Luxe Bidet Neo 120. I also purchased toilet seat bumpers, but these are not required. These are used to elevate the toilet seat to make it level after the bidet is installed.
If you prefer video tutorials, you can watch the video I created over at the EquipMeOT YouTube channel.
Install Luxe Bidet Neo 120 Overview:
Estimated Time: 15 mins
Estimated Cost: $50 USD*
*Estimates are based on historical prices which are subject to change
Supplies:
- Luxe Bidet: Neo 120 (box includes all parts needed for installation)

- Toilet seat bumpers (Optional, depending on your toilet type)

Tools:
- Adjustable crescent wrench (if preferred over plastic wrenches included in bidet)
- Small bucket
- Towel
Steps:
- Remove toilet seat
- Turn off water supply to toilet
- Remove water supply line from toilet
- Place T-valve on toilet tank
- Install water supply line to T-valve
- Install bidet to toilet and replace toilet seat
- Install toilet seat bumpers (optional based on toilet seat type)
- Install water line from bidet to T-valve
- Turn on water supply and check for leaks
- Test bidet and water pressure
Bidet Installation – Step 1: Remove Toilet Seat

Loosen the nuts on the base of the toilet seat bolt and lift toilet seat off of the toilet bowl. This is an excellent time to do a thorough cleaning of the toilet before reinstalling all the parts!
Bidet Installation – Step 2: Turn Off Water Supply to Toilet

Locate the water valve that turns off the water supply to your toilet tank. Mine was right next to the toilet coming out of the wall. Turn the water valve counter-clockwise to turn off the water supply to the toilet.
Remove the top to your toilet tank and flush the toilet to watch to ensure water leaves the tank and does not refill. Flushing the toilet will drain the tank and allow the water to drain from the line and prevent you from becoming wet when removing the flexible water line in the next step.
Bidet Installation – Step 3: Remove Water Supply Line From Toilet

Have a bucket ready for this step! Unscrew the water supply line from the base of the toilet tank. This may require the use of a wrench or it could be done by hand depending on how tight this was applied. Place the line in the bucket to drain remaining water.
Bidet Installation – Step 4: Place T-Valve on Toilet Tank

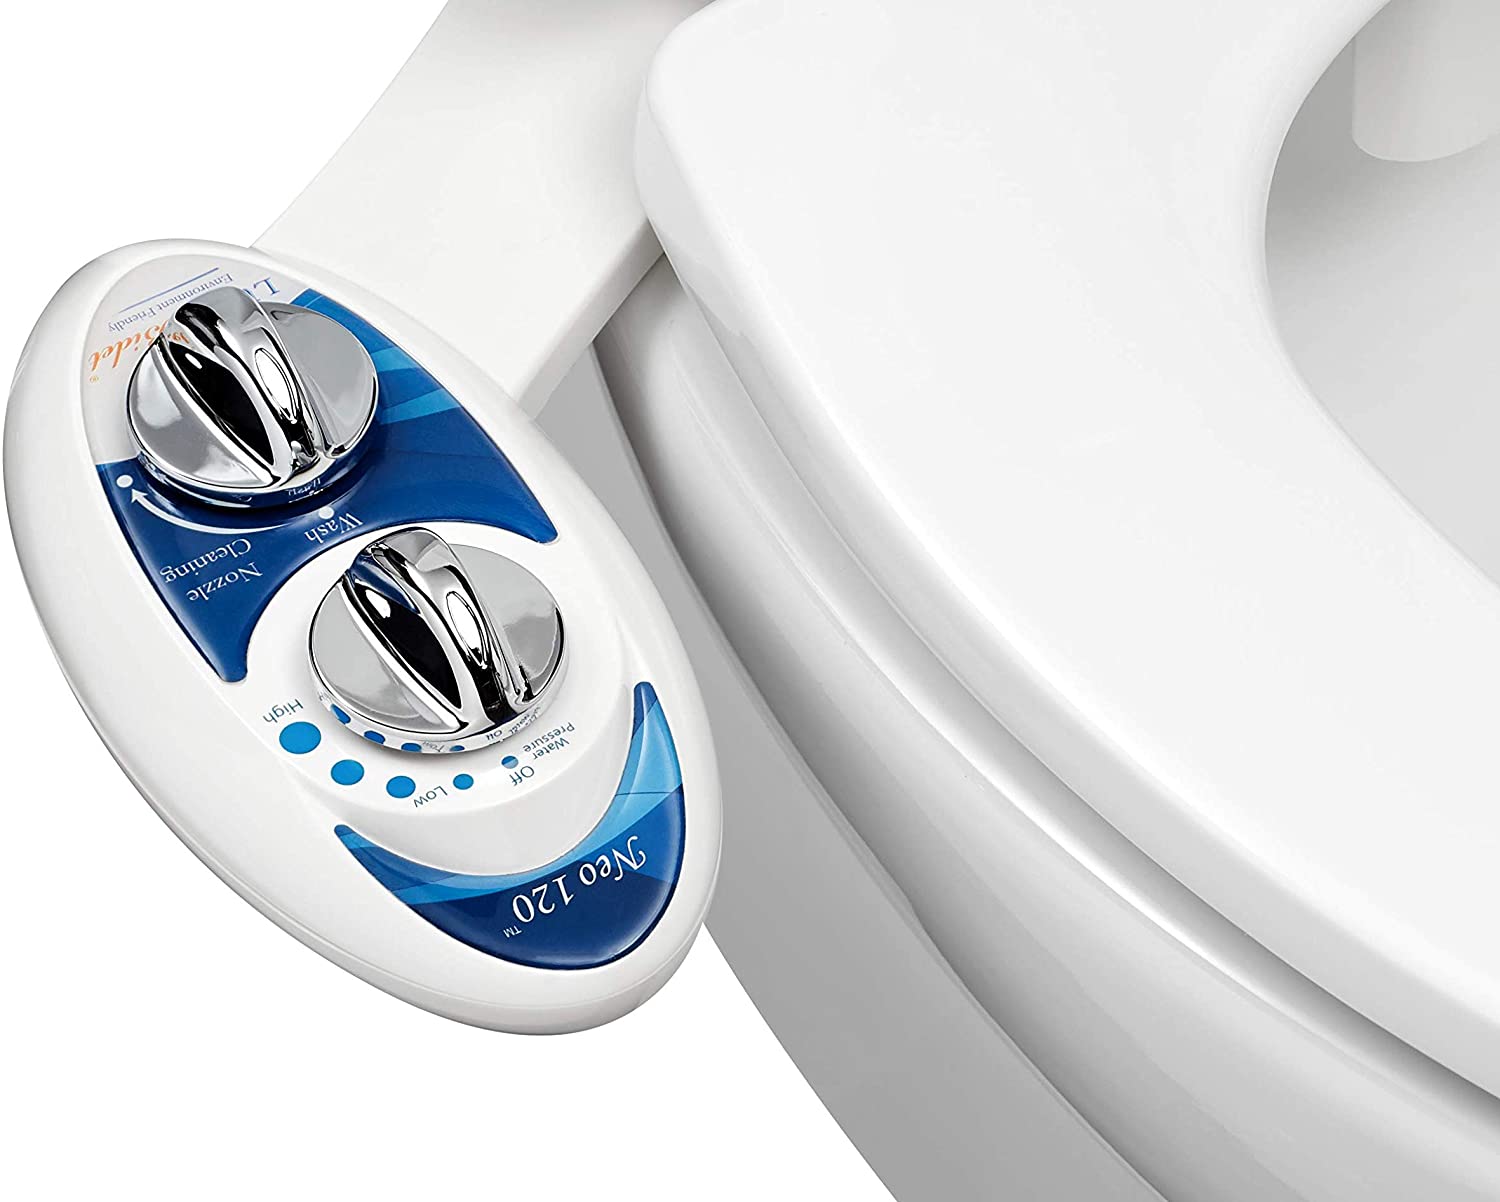
The bidet kit comes with 2 types of T-valves, plastic and metal. These parts are of the same quality and will provide the same life expectancy based on the company description. Select based on what type of product is on your toilet. Mine was plastic, so I stayed with the plastic T-valve during installation. You should also make sure the black rubber gasket is in place at the top of the T-valve before installing (see photo above).
Teflon tape is also provided in the bidet kit and may be applied to the exposed threads on the T-valve for reduced risk of leaks. This should be applied in a thin layer.
Install the T-valve to the tank by tightening it in place.
Bidet Installation – Step 5: Install Water Supply Line to T-Valve
Once you tighten the T-valve in place at the base of the toilet tank, install the water supply line to the bottom of the T-valve you just installed. This is another spot were the teflon tape can be applied before tightening in place.
Bidet Installation – Step 6: Install Bidet Mount to Toilet and Replace Toilet Seat


When installing the bidet/mount, check the position of the circles on the bidet to ensure proper placement over the holes on the back of the toilet bowl. I had a round, rather than elongated, toilet and found that the position was perfect with placement of the bidet about half-way back on the toilet bowl. You may want to adjust position back or forward depending on the shape and size of your toilet.
Once you have the bidet where you want it, place the toilet seat over the bidet mount and fasten the bolts in place.
Bidet Installation – Step 7: Install Toilet Seat Bumpers (optional)

This step will not be necessary for every toilet seat, but my toilet seat was sitting on a slant after the bidet was installed. These bumpers are stick-on. The toilet bumpers can be placed on the underside of the toilet seat to provide the necessary leveling.
Bidet installation – Step 8: Install Water Line From T-valve to the Bidet


The water line that comes with the bidet kit will need to be installed between the T-valve at the base of the toilet tank to the bidet controls. Hand tighten the water line in place using the wing-nut tool attached the the flexible line.
Bidet Installation – Step 9: Turn on Water Supply and Check for Leaks
At this point, all the proper connections should be installed. You can now turn your water supply back on.
Have your towel and bucket ready in case of any leaks. Turn the water supply line on by turning the water valve (see Step 2 above) clockwise. You will hear the water begin to refill the tank on the toilet.
Check for leaks as you listen to the tank refill. Check each connection to ensure there are no drops of water coming off the connections.
Bidet Installation – Step 10: Test Water Pressure
If you don’t have any leaks, you can now test the bidet.
The Luxe Bidet Neo 120 comes with 5 different settings for water pressure. Water pressure is a personal preference and can be adjusted using the settings on the Luxe Bidet Neo 120 controls.
Set the bidet to the lowest pressure setting and prepare to test the bidet.
IMPORTANT: When checking the bidet function, use a bucket over the sprayer or water will spray across your bathroom!
Hold a bucket over the sprayer and test the bidet. Ensure that water is spraying out of the sprayer.
If you find that you have the bidet on the lowest pressure setting the pressure is still too great, you may have to adjust the pressure at your water valve.
The water pressure coming from your water line will translate to the pressure that comes out of the water sprayer on the bidet. Water pressure is specific to each home and will need to be adjusted at the water supply valve.
That’s it. Your Luxe Bidet Neo 120 is now ready for use! Hope this guide was helpful.
Note: This post contains affiliate links that provide a small commission without any added cost to the user.
More Recent Posts
- How to Sleep After a C-Section or Abdominal Surgery

 Recovering from a C-Section, appendectomy, abdominoplasty, or other abdominal surgery can feel overwhelming, especially when it comes to something as essential as sleep. With a tender incision and limited mobility, finding a comfortable position may seem impossible—and yet, proper rest is critical for healing! In this …
How to Sleep After a C-Section or Abdominal Surgery Read More »
- How to Get In and Out of the Car after Hip Replacement
 Getting in and out of a car after a hip replacement can feel like navigating an obstacle course. Ensuring you move safely and avoid unnecessary strain on your healing hip is essential for a smooth recovery. Whether you’re heading to a follow-up appointment or simply enjoying …
How to Get In and Out of the Car after Hip Replacement Read More »
- A Complete Guide to Lower Body Dressing After Hip Replacement Surgery
 Recovering from hip replacement surgery (or similar traumatic injury) comes with its challenges, especially when it comes to everyday tasks like getting dressed. While your mobility may be temporarily limited, dressing your lower body can be made much easier with the right strategies and tools. This …
A Complete Guide to Lower Body Dressing After Hip Replacement Surgery Read More »