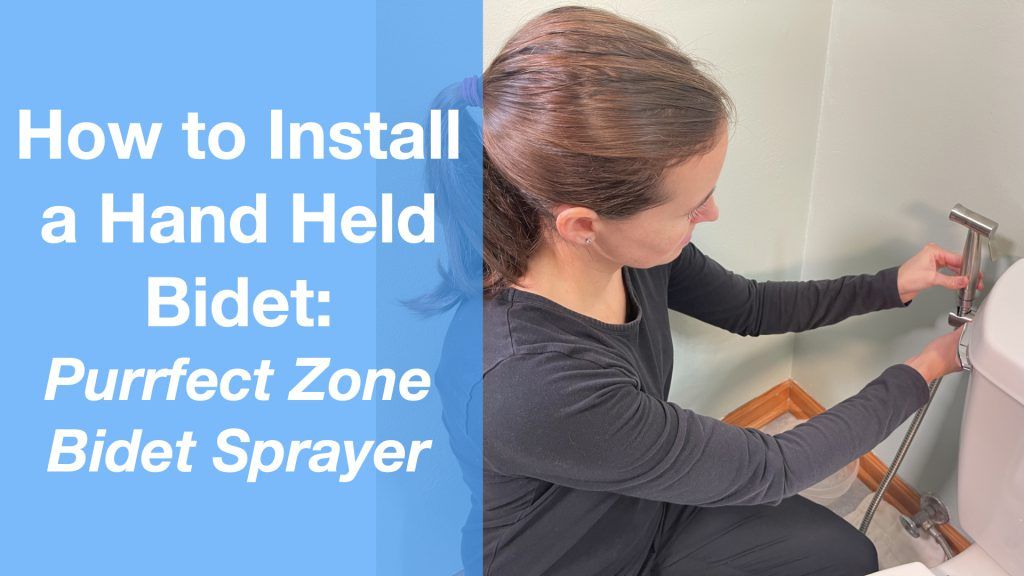
In this post, we’re going to detail how to install a handheld bidet (in our case, the Purrfect Zone Bidet Sprayer).
Handheld bidets are a nice alternative to toilet-mounted bidets if you require more control for your toilet hygiene. The process of how to install a handheld bidet is simple and a handheld bidet is very useful not only for self-hygiene but other cleaning tasks like cleaning reusable diapers!
If you prefer the video version of the complete process of how to install the Purrfect Zone Bidet Sprayer, check out my YouTube Channel EquipMeOT.
Overview
Estimated Time: 15 minutes
Estimated Cost: $30* USD
Please note: Before we begin, please make sure you follow all the instructions and warnings provided by the manufacturer. The steps below are only to provide guidance with installing or assembling equipment, but you should always follow the warnings and instructions provided by the manufacturer.
Supplies Needed
Steps
- Unbox the Handheld Bidet
- Turn Off Water and Empty Tank
- Detach Water Line
- Attach T-Valve
- Connect Water Line
- Attach Sprayer Hose and Sprayer
- Install Sprayer Holder
- Test Sprayer for Leaks
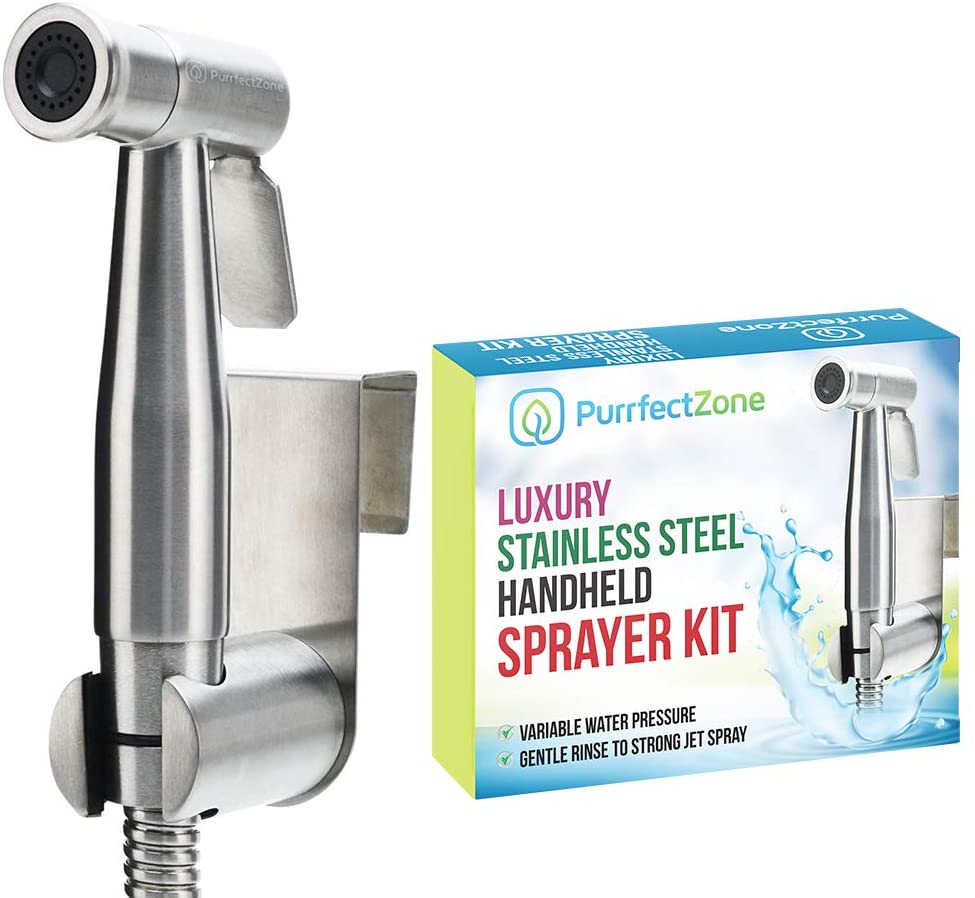
Step 1: Unbox the Handheld Bidet
First, you should open your handheld bidet box and check to make sure that all the correct parts are included.
This PurrfectZone handheld bidet comes as a complete kit. There is a sprayer hose, handheld sprayer, sprayer holder, T-valve, Teflon tape, screws and anchors, and gaskets.
You don’t need to have anything extra to do the installation just a toilet and the system. This handheld bidet is a basic model that does have variable water pressure. Variable water pressure is really important in order to control the power of the spray coming from the sprayer. Too powerful of a spray will make it uncomfortable.

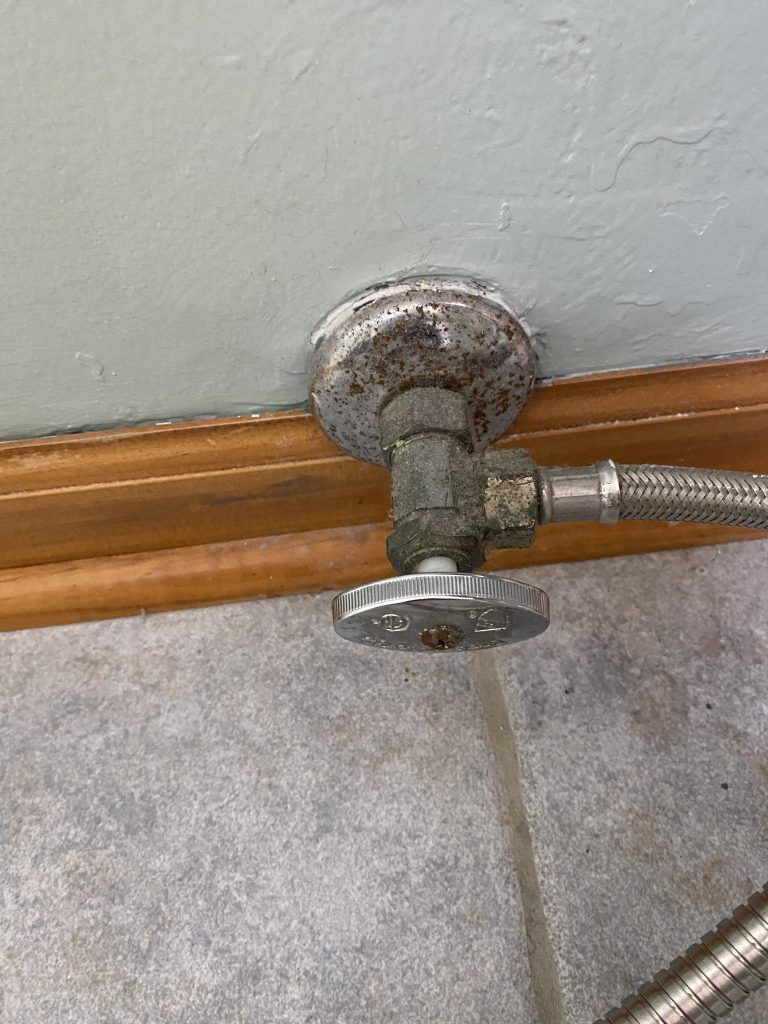
Step 2: Turn Water Off and Empty Tank
Next, you need to turn-off the water to the toilet.
My toilet has a shutoff valve, as most do, in the back behind the toilet tank. You’re going to look for this valve and then turn it all the way to the off position.
Now, you need to empty the water out of the line before disconnecting it. We’re going to do this by emptying out the tank. You can empty the toilet tank by simply flushing the toilet. Because you shut-off the water, you shouldn’t hear any water running in to fill the tank. If you don’t hear any rushing water, that means that you’ve turned off the water correctly.
If you do still hear rushing water, check your water shut-off valve again to ensure that you correctly turned the valve to the “off” position.
Step 3: Detach Water Line
Now, let’s go ahead and unscrew the water line from the base of your toilet tank. Before you do this, I would highly recommend having a bucket and a rag nearby just in case a little water does leak out.
You’re going to reach right underneath the tank where you will find a nut, mine is plastic. Unscrew and remove the nut and line and dry up any water that may come out.
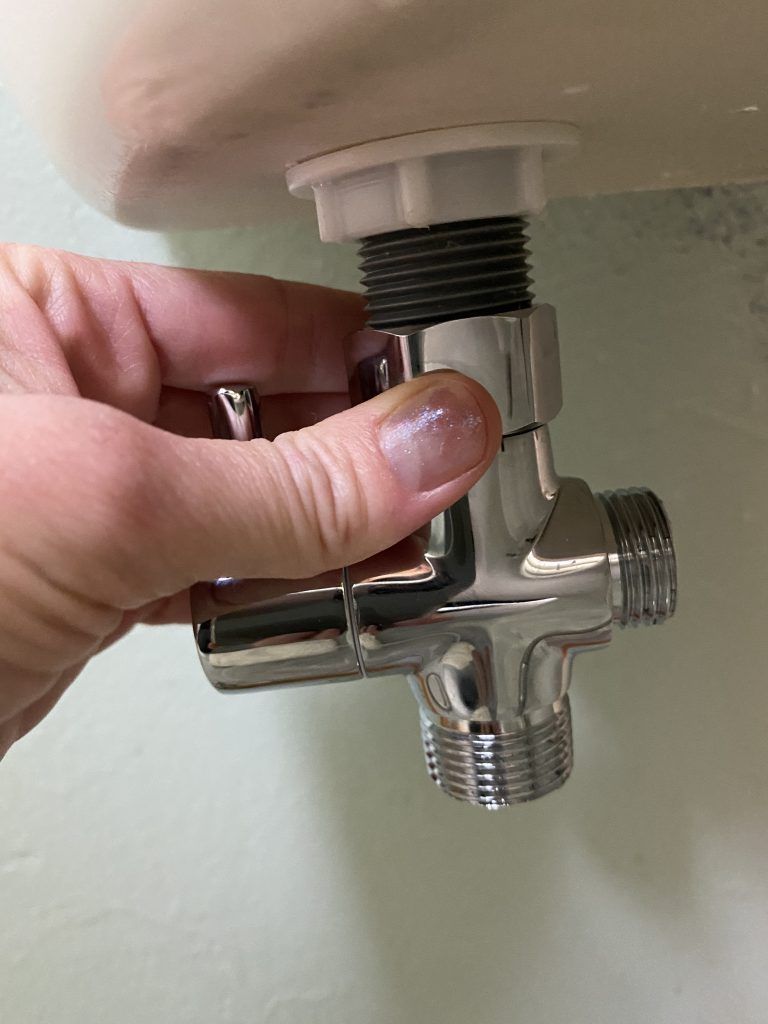
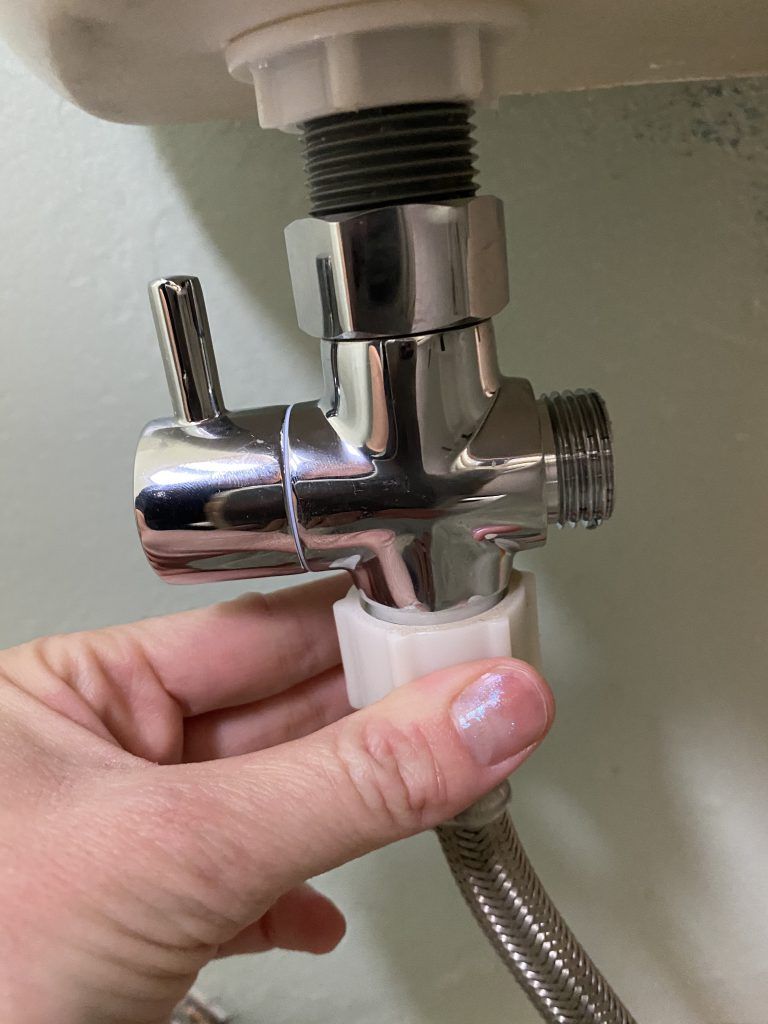
Step 4: Attach T-Valve
Locate your T-valve. The nut on the top of the valve should have a gasket washer on the inside. This nut is going to go up against the base of your toilet tank. The top nut of the t-valve is now going to get screwed on to the threads on the bottom of the toilet tank.
I’m going to hand tighten everything for now, because there’s going to be some adjusting that I do as I go along. I will tighten everything down once its all fully complete.
The manufacturer recommends you turn-off the valve for the system after every use. So, I want to make sure that the turn-off valve is on the outside. I am going to make sure the valve is in the “off” position before moving on.
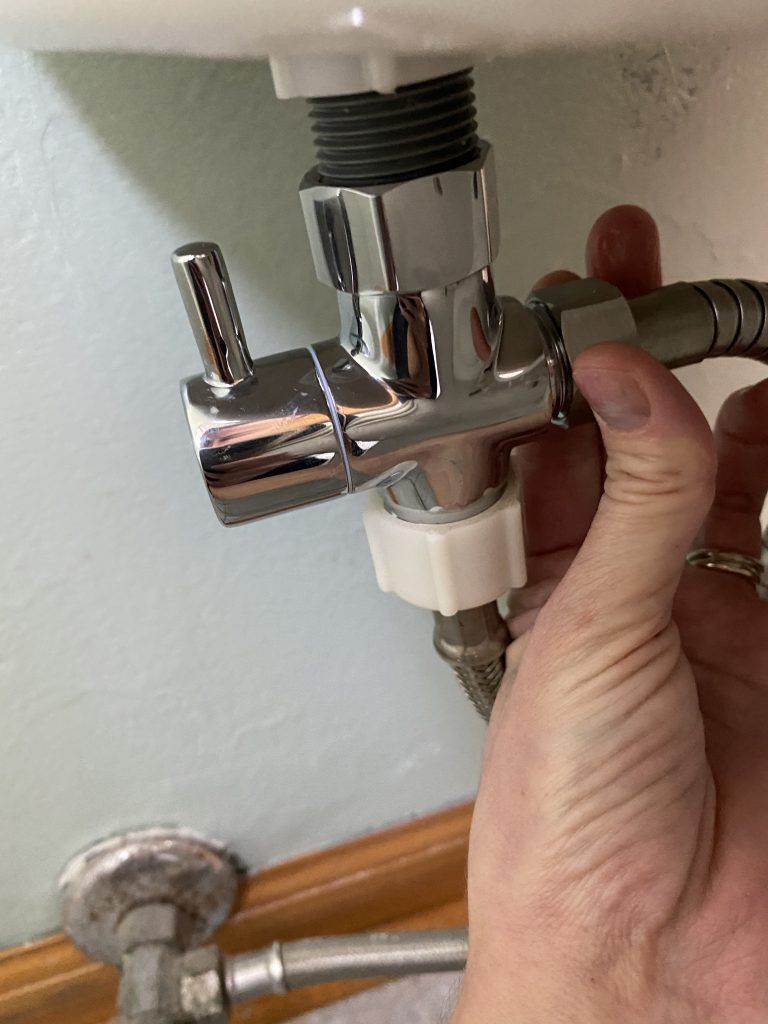
Step 5: Connect Water Line
Next, connect the water line to the bottom threads on T-valve you just installed to the toilet tank. With this model, we need to connect the water line to the bottom of the T-valve (opposite of the side that is connect to the tank). Again, just hand tighten. The other female thread (opposite of the water control on the T-valve) will be used to connect to the bidet sprayer in the next step.
Step 6: Attach Sprayer Hose and Sprayer
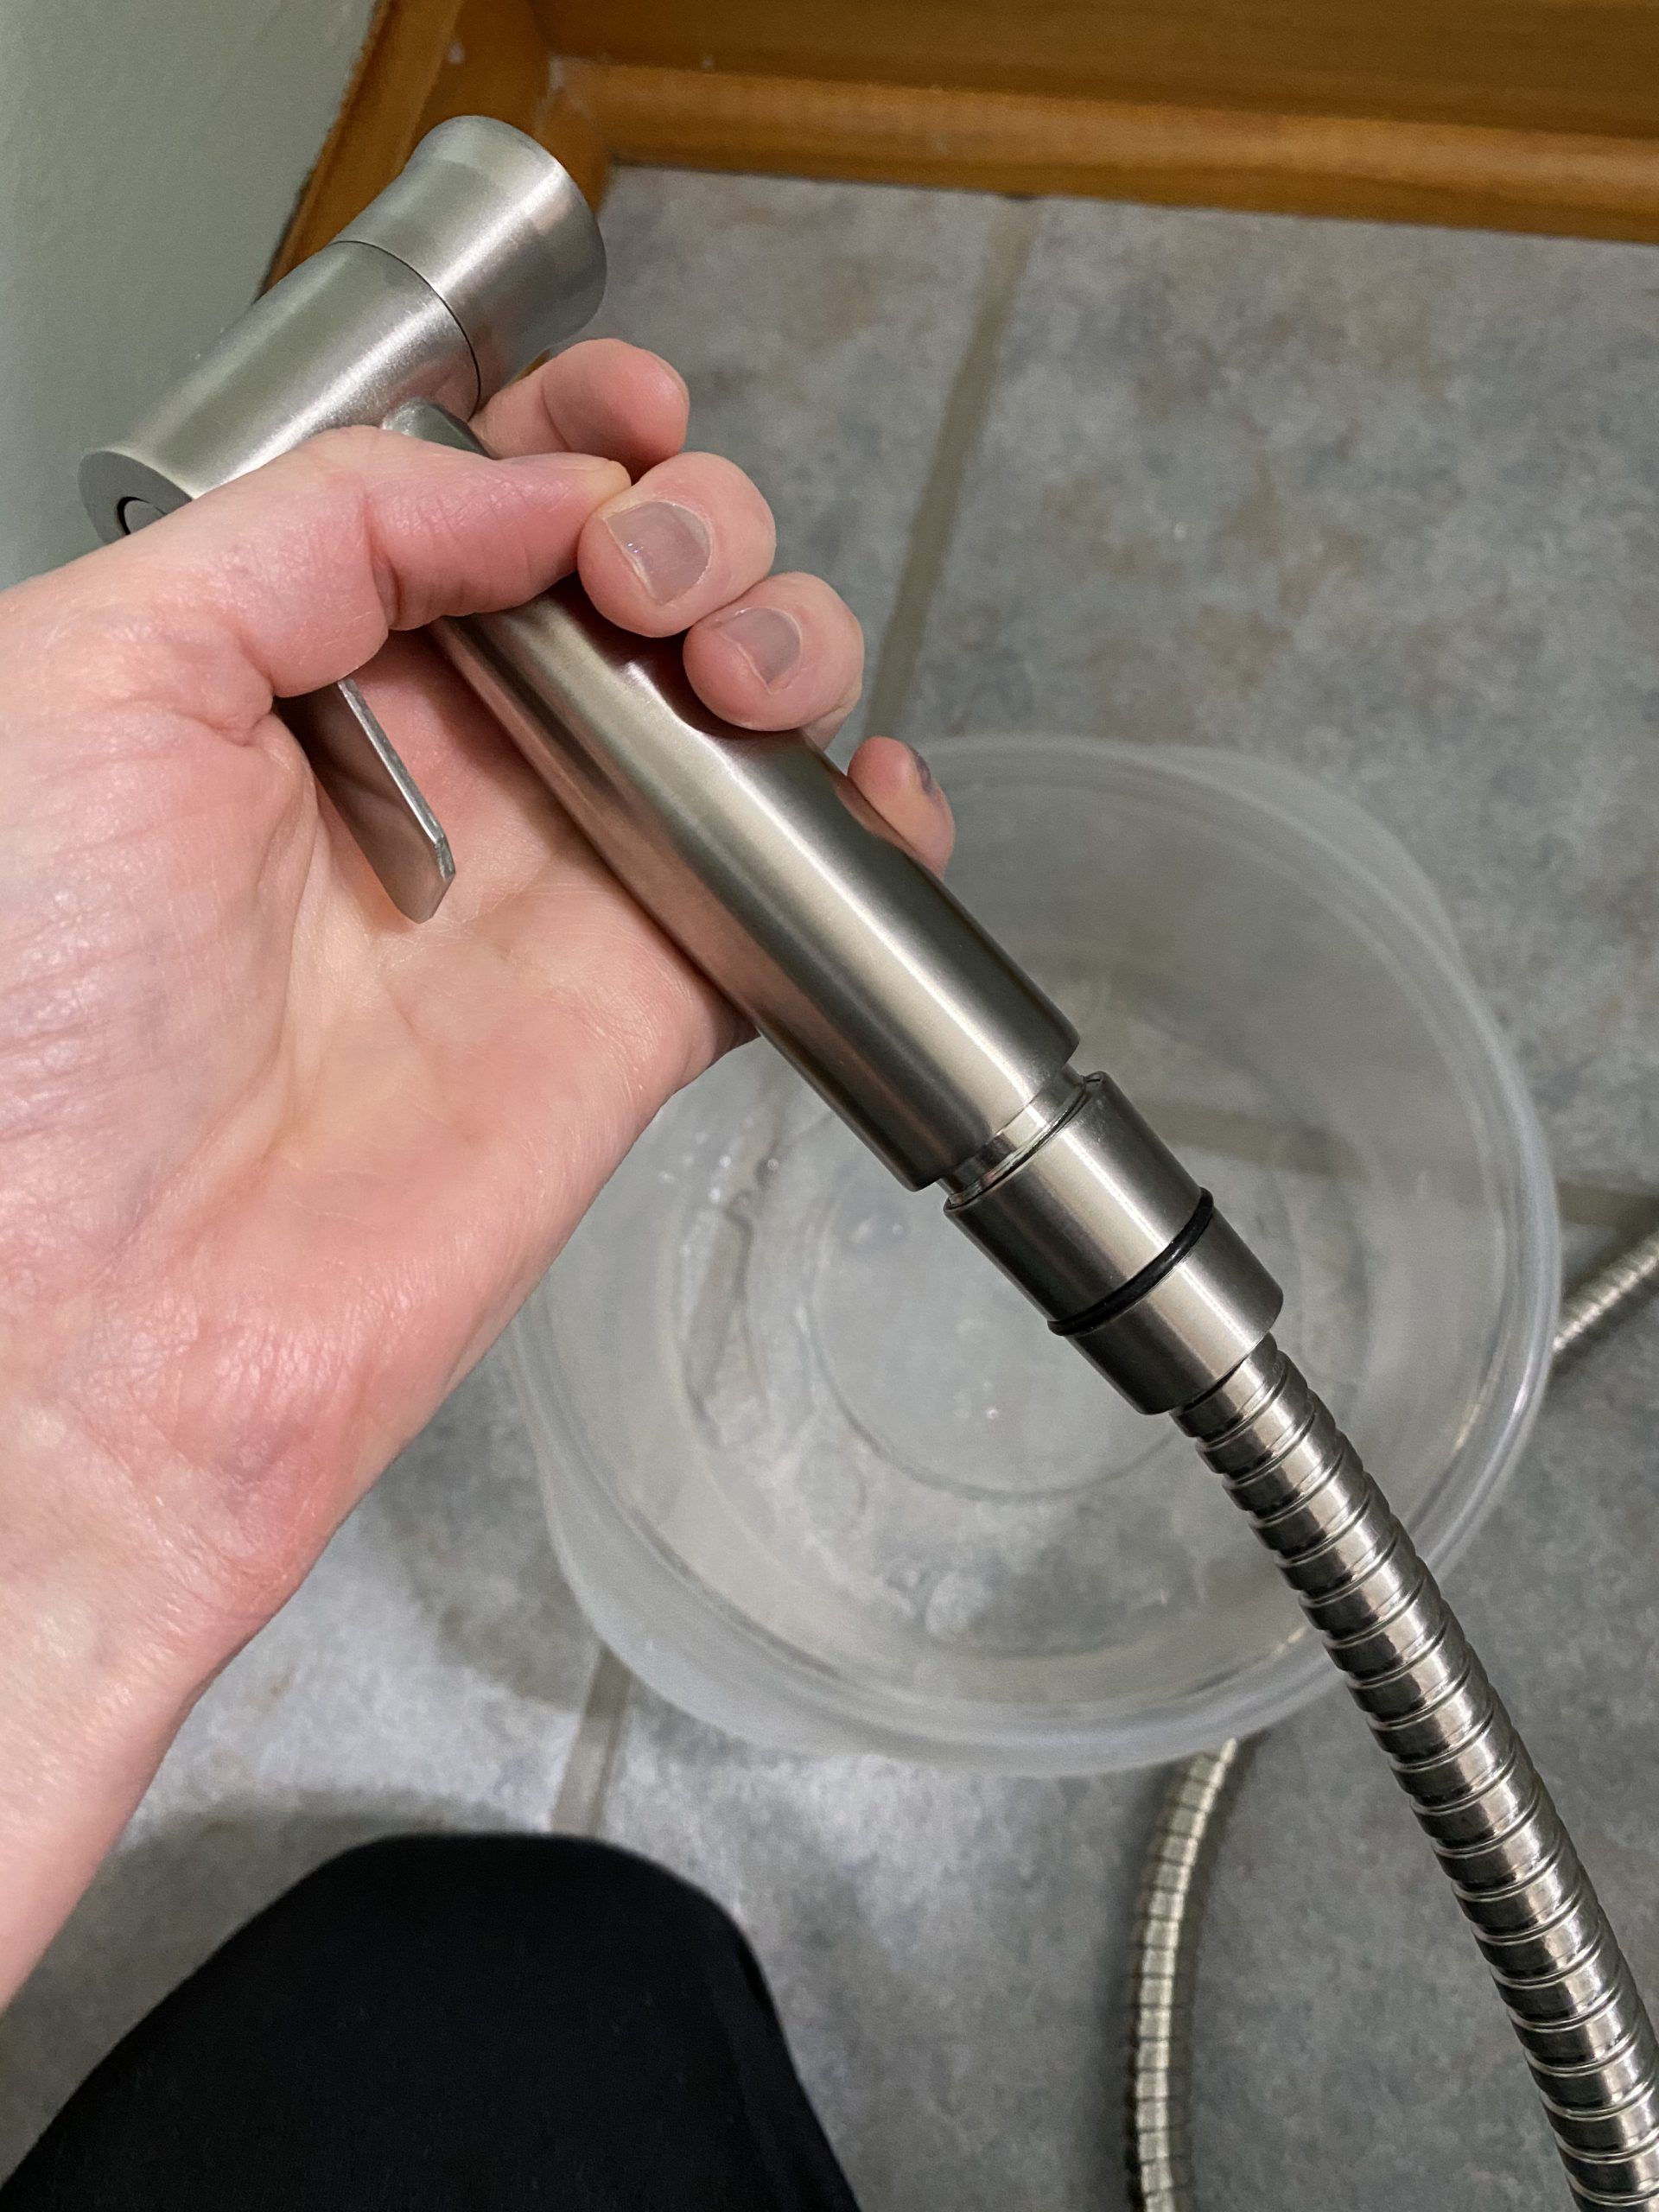
Now, for the the sprayer. We will need the hose and sprayer. Make sure each end of the hose has a black gasket. Screw the end of the hose with the nut onto the threads on the inside of the T-valve. The other end of the hose will screw into the bottom of the sprayer.
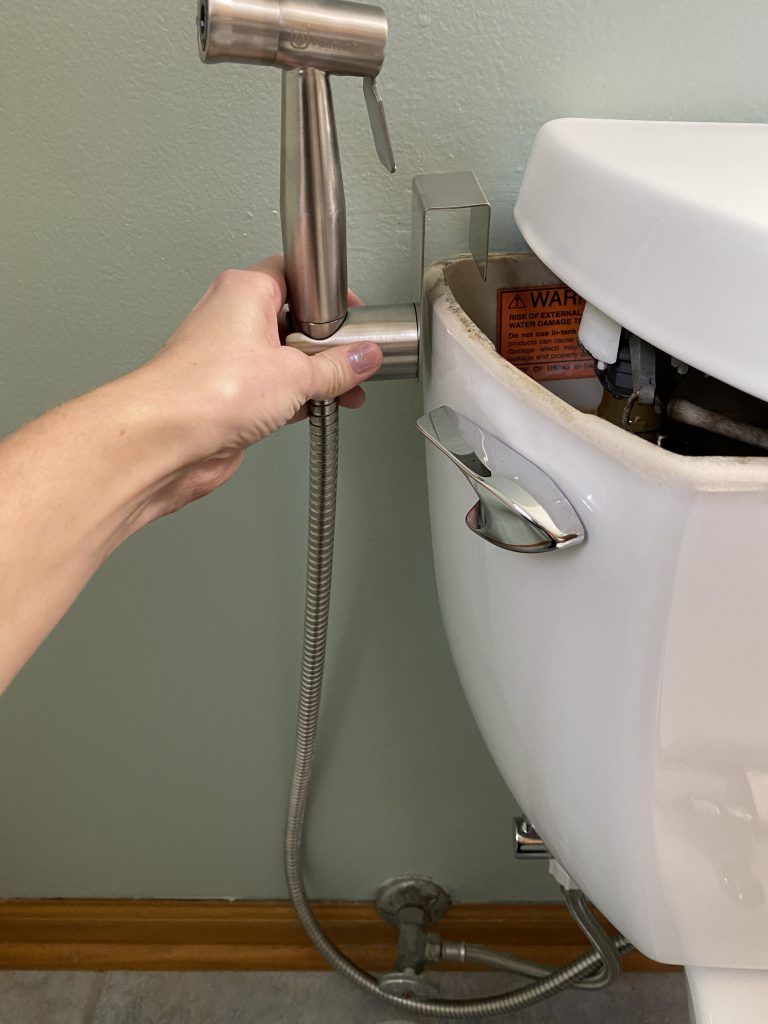
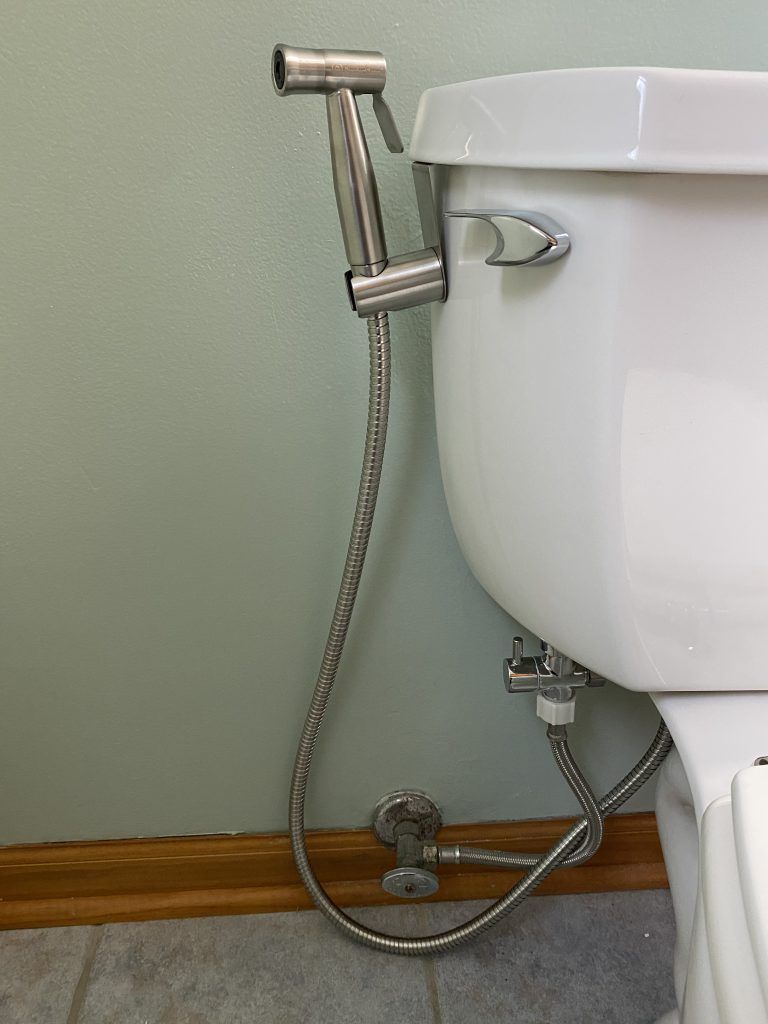
Step 7: Install Sprayer Holder
Our handheld bidet came with a sprayer holder to hold the spray nozzle when not in use. Now is the time to install the sprayer holder. The sprayer holder can be mounted to the wall or hooked on the edge of the toilet tank.
I chose to have it hook onto my tank. I lifted up the top of the tank, hooked on to the edge of the tank, and then put the lid back down.
If you do want to mount it onto the wall, our kit came with the necessary screws and drywall anchors, but you can also find your own at a hardware store or online.
Now, you can place your sprayer in the holder and you’re just about done.
Step 8: Test Sprayer for Leaks
At this point, we need to check if the bidet has any leaks.
Slowly, turn your water back on. I hand tightened everything, so I can go back through and tighten everything a little more if needed. You should hear the water turn on and start filling the tank. Keep turning the water valve until it’s in the same position as when you began.
Test the sprayer by turning on the valve for the system. This is located on the outside of the T-valve. Pointing the sprayer at the toilet bowl, slowly compress the sprayer trigger until water starts to trickle out the sprayer. Check for any leaks in the hose or in the connections. If everything looks good, continue compressing the sprayer trigger until the sprayer is completely open and water is spraying out.
Note: If you have really high water pressure and the lightest spray setting is still too powerful for your comfort, you can back off your water pressure a bit. You can control the water pressure using the water valve on wall.
That’s it! If your handheld bidet is not leaking, it is ready to be used. Remember to follow the manufacturer’s instructions for operation and maintenance.
Note: This post contains affiliate links that provide a small commission without any added cost to the user.
*all prices are at the time of publishing